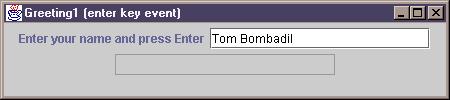
Figure 1: Greeting application before Enter key is pressed}
There are three kinds of Java programs: Console applications, GUI applications,
and applets.
So far we have written only console applications.
They are programs that use the console window as the user interface.
All input is obtained either from command-line arguments or using the
KeyboardReader class.
Even our graphics applications beginning in Chapter 5 were of this form.
In this chapter we introduce graphical user interface (GUI) concepts and design and we write some GUI applications. They run in the window environment and have buttons to click, boxes in which to type, boxes in which to display textual output, and other components as well, such as panels containing graphics. We will also see that a GUI is an event-driven environment whose programming model is quite different from what we are used to with console applications. In order for our programs to respond to events such as pressing the enter key in an input box, clicking a button, clicking or dragging the mouse, it is necessary to write special methods, defined by event listener interfaces, that the system will call when these events occur.
Applets are the third kind of Java program. They always have a GUI but an applet is a special class that is designed to be run by a Web browser instead of the normal Java interpreter that we have been using for application programs. Much of what we learn about GUI applications is also valid for applets so we briefly consider some applet examples and show how they can be tested using a special applet viewer program before running them with a web browser.
A summary of some of the GUI classes used in this chapter is given in Section 15.
A GUI application class is a subclass of the JFrame class.
We will call such a class a GUI application.
A main method is used to construct an application object.
The GraphicsFrame class used in Chapter 5 is an example.
A JFrame object is a top-level component that appears
as a window with a frame
around it containing a title bar at the top.
There are also buttons to minimize, maximize, or close the frame.
By default the interior of the frame is empty.
We will learn how to place other components inside the frame that respond to user
actions such as pressing the Enter key after some text has been typed in a box
or using the mouse to click a button.
Also by default the frame's close button does not respond to mouse clicks so the application cannot be terminated. We will consider several ways to fix this to obtain a closeable frame that will terminate the application.
Here is a class template that we will use for our simple GUI applications:
Class ApplicationTemplate/* PURPOSE: Use this class as a template for simple GUI application programs. */ import booklib.WindowCloser; import java.awt.*; import java.awt.event.*; import javax.swing.*; import javax.swing.event.*; public class ApplicationTemplate extends JFrame implements ActionListener { // Declare instance variables for GUI components here // Declare any other instance or class variables here public ApplicationTemplate() { setTitle("Put your frame title here"); // Statements to create GUI components go here // Statements to add them to the frame go here // statements to add action listeners go here addWindowListener(new WindowCloser()); // listen for window close event setSize(400,300); // size of the frame } /* This method is called when an action event occurs */ public void actionPerformed(ActionEvent e) { // statements to process action events go here } /* Construct an application and make it visible */ public static void main(String[] args) { JFrame f = new ApplicationTemplate(); f.setVisible(true); } }
This is not the most general form of a GUI application class but it will suffice for many of the examples in this chapter. For now, let us give a brief overview of each part of the template:
import statements that are needed to
access the GUI classes and the Swing user interface
components (the new platform-independent GUI components).JFrame which is a top-level component that
provides the basic functionality of a window with a frame around it,
a title bar with a title in it, and minimize, maximize and close buttons.
It is a container for other GUI components that implements
the ActionListener interface to provide for
responses to user interaction.
We will also consider approaches to event handling using other classes to
implement listener interfaces instead of the application class itself.main method is responsible for constructing an application
object as a JFrame and the setVisible
statement makes it visible.
Without this statement the frame would remain invisible when the application
is runningsetTitle method and provide the width and height in
pixels of the frame using the setSize method.
The constructor is also be responsible for adding the various event listeners
to the appropriate components.
In particular we will need to specify that the frame should be closed
and the application terminated when the frame's close button is clicked.
Initially we will provide a small special class called WindowCloser
in the booklib package that knows how to close the window.
The statement
addWindowListener(new WindowCloser());
actionPerformed method.
Our event processing code will go in the body of this method.
The ApplicationTemplate class can be compiled and run as
usual with the javac and java commands.
When the interpreter executes the statements in the main method
the frame is created and made visible.
Of course this application doesn't do anything so you will see only an empty
400 by 300 pixel frame.
Clicking the close box closes the window and terminates the program.
To make the GUI application useful we need to learn how to put some
graphical user interface components in the window and have them respond
to user actions.
The Java GUI is object-oriented.
This means that each GUI component
you see on the screen is an object from some class
(these components are sometime called widgets).
The simplest GUI components are objects from the
JLabel, JButton,
JTextField, and JTextArea classes.
These classes all have JComponent as one of their superclasses.
Our first application will be a simple class called Greeting1 that
asks the user to enter a name in a text field and press the Enter key when done.
Then a greeting is displayed in another text field.
The greeting is the word Hello followed by the name typed.
Figure 1 shows what the application looks like when the name
has been typed.
After the Enter key is pressed the application is shown in Figure 2.
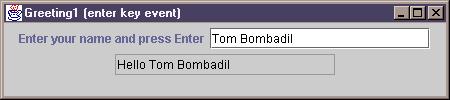
You can easily identify three component objects in the frame: (1) a prompt string, (2) an input box for typing the name, and (3) an output box for displaying the greeting. The boxes are called text fields.
First we need to decide which GUI components are needed. We will use the following three components
JTextField object called input
which defines the field in which
the name can be typed (white box in Figure 1 or Figure 2.JLabel object called prompt
which provides a place on the
screen to display a label or prompt string defining what this field should
contain.JTextField object called output
which defines a field on
the screen in which the greeting can be displayed (gray outlined box in
Figure 1 or Figure 2.)
Later we will also use JButton objects which are buttons
that respond to mouse clicks.
Now we can declare instance variables for these three components as follows
private JLabel prompt;
private JTextField input;
private JTextField output;
These variables are the names of the GUI component objects.
In the Greeting1 constructor we can create the objects as follows
prompt = new JLabel("Enter your name and press Enter");
input = new JTextField(20);
output = new JTextField(20);
output.setEditable(false);
These statements define a JLabel
object with the given string as label
and two JTextField objects that can hold about 20 characters each.
By default a text field permits input.
In our case the output field should not accept input
so the setEditable method is used
with the output field.
A false argument indicates that input is not allowed and a
true argument indicates that input is allowed.
You can visually distinguish an output-only text field from an input field.
JFrame
is called BorderLayout.
However, we want to use the FlowLayout manager.
It lays out the components in left to right order in the frame,
moving components to the next line when there is no room on the current line
for the next component.
It's just like putting text on a page using word wrap.
When the right margin is reached a new line is begun.
Here we are laying out components instead of text.
In the application frames shown in Figure 1 and Figure 2
there are two objects on the first line
(the prompt and input objects)
and one on the second line (the output object).
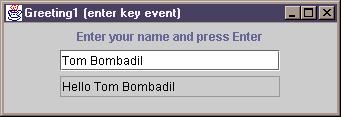
If you resize the application window with the mouse then the objects
flow (hence the name FlowLayout manager)
to accommodate the new size.
For example, a narrower size produces the layout shown in
Figure 3 having three rows with one object per row.
Once a layout manager has been chosen it is specified using
the setLayout method and then the add
method is used to specify
the components to the layout manager.
The components are added to the content pane of the frame.
In our greeting example we need to use the following statements
to add components.
Container cp = getContentPane();
cp.setLayout(new FlowLayout());
cp.add(prompt);
cp.add(input);
cp.add(output);
A JFrame is composed of several layers called panes.
The only pane we need to work with is the content pane:
when adding components to a JFrame we must add them
to the frame's content pane.
The first line gets the frame's content pane which is a
Container object and
declares cp to be a reference to it.
This is another example of the container concept introduced in
Chapter 9:
a Container object holds GUI components.
The next line specifies that a FlowLayout manager should be used.
The last three lines add the three components to the container.
The order is important since it specifies the left to right, top to bottom
order that the layout manager will use.
The final step in our GUI design is to indicate what should happen when the Enter key is pressed or the frame's close box is clicked. This is called event-driven programming. In this style of programming we decide what events we want to process, for example, clicking a button with the mouse, pressing Enter in a text field, or dragging the mouse. We must provide some methods that the component can call to process each kind of event. This programming model is quite different from that which we have been doing so far (e.g., get some input, call a method to do some calculations, call a method to display some results).
In event-driven programming we supply methods to handle events
but we do not call them ourselves
(we have already seen two examples: we have written main methods and
paintComponent methods but we never call them).
Instead the component calls them when the event occurs.
This is illustrated in Figure 4.
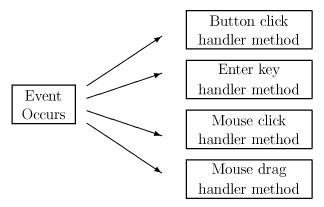
When an event occurs, represented by the box on the left, the component calls the appropriate event handler method. Four such methods are indicated by the four boxes on the right. The arrows represent the calling of the method.
The information describing each event is stored in an event object.
For example, when the user clicks a button or presses the Enter key in a
text field, the event is called an action event and the information
describing this event is stored in an ActionEvent object.
How does the component which receives the event know which event handler
object contains the method it should call?
The answer is simple.
Each event handler implements one of the EventListener interfaces.
In the case of a button or a text field this is the ActionListener interface.
For the mouse it could be one or both of the MouseListener
or MouseMotionListener interfaces.
Internally the component maintains a list of references to the event handler objects that want to listen for events generated by the component. This is illustrated in Figure 5.

In our greeting example the JTextField object called input
needs to know that our application wants to listen for events generated by the
pressing of the Enter key.
This is done using the statement
input.addActionListener(this);The
addActionListener method simply adds a listener to the list of listeners
maintained by the JTextField object and in this case the application class
itself, referred to by this, is the listener:
the first line of our Greeting1 class specifies that the
class implements the ActionListener interface.
Finally we need to know that any class that implements the ActionListener
interface
must provide an implementation of the actionPerformed
event handling method having the form
public void actionPerformed(ActionEvent e)
{
   // statements to process action events go here
}
When the enter key is pressed after entering text in a JTextField object
this method is called.
The ActionEvent object argument describes the details of the event.
In particular it can be used to determine which component generated
the action event.
In our example we have only one component generating action events, so we
do not need to use the ActionEvent object e.
Nevertheless, it must be present as an argument since it is part of the
interface specification.
The only other event generated by our application is the 'window close event'.
We need to specify a listener for this event.
Such a listener must implement the WindowListener interface.
This is a more complicated interface than the ActionListener interface
since it requires that seven methods be implemented, instead of just the one
actionPerformed method for the ActionListener interface.
Since we are only concerned with one of these seven methods, namely the
windowClosing method,
this can be made easier by extending the WindowAdapter class which
is an adapter class (see Chapter 11) that
implements the seven methods using 'do nothing' empty bodies.
We simply provide a new windowClosing method.
The entire class is given by
Class WindowCloserpackage booklib; import java.awt.event.WindowAdapter; import java.awt.event.WindowEvent; /** A special class that can be used to close a JFrame by adding it as a WindowListener. */ public class WindowCloser extends WindowAdapter { public void windowClosing(WindowEvent e) { System.exit(0); } }
Since this class would be the same for all applications we keep it in a
separate file that is part of the booklib package introduced
in Chapter 9.
The frame itself is the component which generates window close events so
we need to add an object of our WindowCloser class to the frame's
listener list using the statement
addWindowListener(new WindowCloser());which is really
this.addWindowListener(new WindowCloser());Now, when you click on the close box the
windowClosing
method is executed to terminate the application.
In Java 1.3 it is possible to avoid constructing a window listener and adding
it to the JFrame: the JFrame class has a
setDefaultCloseOperation method with an option to 'exit on close'.
It can be called in the main method
(see the ApplicationTemplate class) using
f.setDefaultCloseOperation(JFrame.EXIT_ON_CLOSE);
We are almost finished with our introductory Greeting1 application.
We just need to put some code into the body of the actionPerformed
method that will display the greeting in the box associated with the
output object.
This is easy because JTextField objects have a getText
method which returns the text in the field as a String object
and a setText method which takes a String object argument
and sets the field to that text.
These methods have prototypes
public String getText();            // return text from a text field
public void setText(String text);   // display given text in a text field
Therefore the body of the
actionPerformed method is
String name = input.getText();
output.setText("Hello " + name);
which could even be done with the single statement
output.setText("Hello " + input.getText());
In terms of the message passing terminology we send the getText message
to the input object and the setText
message to the output
object so these two text field objects communicate by message passing.
Here is the complete application class:
Class Greeting1/* PURPOSE: To show how to use the enter key to trigger an event. */ import booklib.WindowCloser; import java.awt.*; import java.awt.event.*; import javax.swing.*; import javax.swing.event.*; public class Greeting1 extends JFrame implements ActionListener { private JLabel prompt; private JTextField input; private JTextField output; public Greeting1() { setTitle("Greeting1 (enter key event)"); prompt = new JLabel("Enter your name and press Enter"); input = new JTextField(20); output = new JTextField(20); output.setEditable(false); Container cp = getContentPane(); cp.setLayout(new FlowLayout()); cp.add(prompt); cp.add(input); cp.add(output); input.addActionListener(this); addWindowListener(new WindowCloser()); setSize(450,100); } /* This method is called when enter key is pressed in the input field. */ public void actionPerformed(ActionEvent e) { String name = input.getText(); output.setText("Hello " + name); } /* Construct an application and make it visible */ public static void main(String[] args) { JFrame f = new Greeting1(); f.setVisible(true); // make frame visible } }
input
and output variables must be
declared as data fields since they are needed in both the constructor and the
actionPerformed method.
However, the prompt declaration could have been moved inside the
constructor as a local variable using
JLabel prompt = new JLabel("Enter your name and press Enter");
since it is not needed outside the constructor.
In fact we could go further and not give it a name at all by replacing
cp.add(prompt);with the statement
cp.add(new JLabel("Enter your name and press Enter"));
As a matter of style it is best to declare all GUI variables as data fields,
as we have done in the greeting application.
As a variation of the Greeting1 application let us use a button object,
instead of the Enter key,
to generate the action event that produces the greeting in the output field.
We will call it the Greeting2 application.
The application frame is shown in Figure 6.
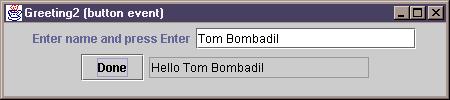
We can modify Greeting1 to obtain Greeting2.
First add a reference to a JButton using
private JButton done;In the constructor define the button using
done = new JButton("Done");
which specifies that the button should have the string Done displayed
on it.
Also add it to the frame using
cp.add(done);and finally, replace the statement
input.addActionListener(this);with the statement
done.addActionListener(this);to specify that our application will listen for button click events.
Here is the revised application class.
Class Greeting2/* PURPOSE: To show how to use a button to trigger an event. */ import booklib.WindowCloser; import java.awt.*; import java.awt.event.*; import javax.swing.*; import javax.swing.event.*; public class Greeting2 extends JFrame implements ActionListener { private JLabel prompt; private JTextField input; private JTextField output; private JButton done; public Greeting2() { setTitle("Greeting2 (button event)"); prompt = new JLabel("Enter name and press Enter"); input = new JTextField(20); output = new JTextField(20); output.setEditable(false); done = new JButton("Done"); Container cp = getContentPane(); cp.setLayout(new FlowLayout()); cp.add(prompt); cp.add(input); cp.add(done); cp.add(output); done.addActionListener(this); addWindowListener(new WindowCloser()); setSize(450,100); } /* This method is called when the done button is clicked. */ public void actionPerformed(ActionEvent e) { String name = input.getText(); output.setText("Hello " + name); } /* Construct an application and make it visible */ public static void main(String[] args) { JFrame f = new Greeting2(); f.setVisible(true); // make frame visible } }
Now pressing the Enter key has no effect since there are no listeners attached
to the input field.
We could also specify that either pressing the Enter key or the done
button should cause the action event. This can be done by adding both as listeners:
input.addActionListener(this);
done.addActionListener(this);
Now the
actionPerformed method will be called in either case.
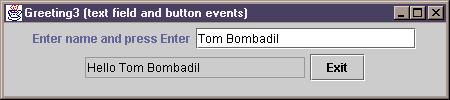
As another modification to the Greeting1 application let us include an
exit button on the frame. When it is pressed the application should
be terminated in the same manner as pressing the close box.
As in Greeting1 the Enter key can be used to signal
that the greeting should be displayed in the output field.
We will call this application Greeting3.
The application frame is shown in Figure 7.
Now we run into a problem writing the actionPerformed method.
This method can be called either when the Enter key is pressed or when the
exit button is clicked.
Since the actions are different in each case we need to know which event occurred
This is where the ActionEvent object method argument is useful.
We can ask this object which component
signalled the event using the getSource method in the
ActionEvent class.
The actionPerformed method is now given by
public void actionPerformed(ActionEvent e)
{
   if (e.getSource() == input) // enter was pressed
   {
      String name = input.getText();
      output.setText("Hello " + name);
   }
   else // exit button must have been clicked
   {
      System.exit(0); // exit program
   }
}
Thus, if getSource returns the reference input then we know
the Enter key was pressed. If it returns the reference exit we know
the exit button was pressed.
Here is the complete application class.
Class Greeting3/* PURPOSE: To show how to distinguish different kinds of events using the getSource() method in ActionEvent class. */ import booklib.WindowCloser; import java.awt.*; import java.awt.event.*; import javax.swing.*; import javax.swing.event.*; public class Greeting3 extends JFrame implements ActionListener { private JLabel prompt; private JTextField input; private JTextField output; private JButton exit; public Greeting3() { setTitle("Greeting3 (text field and button events)"); prompt = new JLabel("Enter name and press Enter"); input = new JTextField(20); output = new JTextField(20); output.setEditable(false); exit = new JButton("Exit"); Container cp = getContentPane(); cp.setLayout(new FlowLayout()); cp.add(prompt); cp.add(input); cp.add(output); cp.add(exit); input.addActionListener(this); exit.addActionListener(this); addWindowListener(new WindowCloser()); setSize(450,100); } /* This method is called when the enter key is pressed in the input field or when the exit button is clicked. */ public void actionPerformed(ActionEvent e) { if (e.getSource() == input) // enter was pressed { String name = input.getText(); output.setText("Hello " + name); } else // exit button must have been clicked { System.exit(0); // exit program } } /* Construct an application and make it visible */ public static void main(String[] args) { JFrame f = new Greeting3(); f.setVisible(true); // make frame visible } }
There is another elegant way to process events that uses inner classes to specify
event handlers.
An inner class is defined inside another class (called the outer class).
An important feature of inner classes is that they can directly access
the data fields of the outer class.
We will write a variation of Greeting3 called Greeting4 that
uses inner classes for event handlers.
For example, an inner class to handle the pressing of the Enter key in
the input field is
public class EnterKeyHandler implements ActionListener
{
   public void actionPerformed(ActionEvent e)
   {
      String name = input.getText();
      output.setText("Hello " + name);
   }
}
This class contains only the actionPerformed method and this
method refers to the input and output variables defined in the
outer class, namely the Greeting4 class.
We could have made this class an external class in its own file but it would
not have access to the input and output
variables -- and this is the power of inner classes.
Similarly we write another inner class to handle the closing of the window when the exit button is pressed:
public class ExitButtonHandler implements ActionListener
{
   public void actionPerformed(ActionEvent e)
   {
      System.exit(0); // exit program
   }
}
We need to add objects of these classes as action listeners so we replace
the two statements
input.addActionListener(this);
exit.addActionListener(this);
from
Greeting3 with the statements
input.addActionListener(new EnterKeyHandler());
exit.addActionListener(new ExitButtonHandler());
since the application class
this is no longer handling these events.
Therefore it is important to remove the phrase implements ActionListener
from the Greeting4 class header
and to remove the actionPerformed method
from the Greeting4 class
since the inner classes are now implementing the
ActionListener interface.
We could also have made the indowCloser class into an inner class but
since it is identical for any application and doesn't refer to any specific
application variables we have made it a class in its own file.
Here is the application class.
Class Greeting4/* PURPOSE: To show how to use inner classes for event handlers */ import booklib.WindowCloser; import java.awt.*; import java.awt.event.*; import javax.swing.*; import javax.swing.event.*; public class Greeting4 extends JFrame { private JLabel prompt; private JTextField input; private JTextField output; private JButton exit; public Greeting4() { setTitle("Greeting4 (text field and button events)"); prompt = new JLabel("Enter name and press Enter"); input = new JTextField(20); output = new JTextField(20); output.setEditable(false); exit = new JButton("Exit"); Container cp = getContentPane(); cp.setLayout(new FlowLayout()); cp.add(prompt); cp.add(input); cp.add(output); cp.add(exit); input.addActionListener(new EnterKeyHandler()); exit.addActionListener(new ExitButtonHandler()); addWindowListener(new WindowCloser()); setSize(450,100); } /* The actionPerformed method of this inner class will be called whenever the enter key is pressed in the input field. */ public class EnterKeyHandler implements ActionListener { public void actionPerformed(ActionEvent e) { String name = input.getText(); output.setText("Hello " + name); } } /* The actionPerformed method of this inner class will be called whenever the exit button is clicked. */ public class ExitButtonHandler implements ActionListener { public void actionPerformed(ActionEvent e) { System.exit(0); // exit program } } /* Construct an application and make it visible */ public static void main(String[] args) { JFrame f = new Greeting4(); f.setVisible(true); // make frame visible } }
Now an if statement that uses getSource is not required to determine
the component that triggered the event.
The EnterKeyHandler object is associated
only with the input
component so its actionPerformed method can only be called when the
Enter key is pressed.
When you compile the Greeting4 class you will get the following three
class files:
Greeting4.class
Greeting4$EnterKeyHandler.class
Greeting4$ExitButtonHandler.class
For inner classes the compiler makes up names consisting of the outer class name, followed by the
$ sign followed by the inner class name.
The field of a JTextField object always contains a string.
The getText and setText methods
are used to get and set the string in the field.
For the temperature conversion application the input field will correspond to a
temperature in degrees Celsius and the output field will correspond to a
temperature in degrees Fahrenheit.
When the Enter key is pressed in the input text field, the input temperature is
converted to Fahrenheit and displayed in the output text field.
The application frame is shown in
Figure 8 after the Enter key has been pressed.

Since the input field contains a string we need to convert this string to a
double number.
Also when the conversion calculation has been performed the Fahrenheit temperature
must be converted back to a string so that it can be displayed using
setText in the output field.
These conversions are easily performed.
A number can be converted to a string by simply concatenating it with the empty string.
For example, if n is an int,
float or double number,
either of the following expressions convert it to a string.
"" + n
String.valueOf(n)
Therefore if you want to display a number
n
in a JTextField called output use either of the statements
output.setText("" + n);
output.setText(String.valueOf(n));
Conversely, it is easy to convert strings to numbers.
For example, to convert a string s
to an int number or a double number you can use
the expressions
Integer.parseInt(s)
Double.parseDouble(s)
Therefore if
input is the name of a JTextField object then the
string in it can be returned as an int value using the statement
int i = Integer.parseInt(input.getText().trim());or it can be returned as a
double value using the statement
double d = Double.parseDouble(input.getText().trim());In these statements
trim is used to remove any leading or trailing spaces
that may have been typed.
These would give an error in the conversion of the string to a number.
Later we will show how the JTextField class can be extended to an
InputJTextField class that has getInt
and getDouble methods to perform these conversions automatically.
For the temperature application we need to get the string that the user types
in the input box, convert it to a double number, compute the corresponding
Fahrenheit temperature and convert it back to a string which can be displayed
in the output field.
This can be done by placing the following statements in the actionPerformed
method.
double tc = Double.parseDouble(input.getText().trim());
double tf = (9.0/5.0) * tc + 32.0;
output.setText("" + tf);
We can now easily modify the >Greeting4 class to produce the temperature
application: we need a JLabel object called prompt
to label the input field, a JTextField called input
for the Celsius input temperature,
and a JTextField called output
for the converted Fahrenheit temperature.
Here is the application class.
Class Temperature/* PURPOSE: Converting a Celsius temperature to a Fahrenheit. */ import booklib.WindowCloser; import java.awt.*; import java.awt.event.*; import javax.swing.*; import javax.swing.event.*; public class Temperature extends JFrame { private JLabel prompt; private JTextField input; private JTextField output; public Temperature() { setTitle("Celsius to Fahrenheit Conversion"); setSize(325,100); prompt = new JLabel("Enter Celsius temperature, press Enter"); input = new JTextField(10); output = new JTextField(10); output.setEditable(false); Container cp = getContentPane(); cp.setLayout(new FlowLayout()); cp.add(prompt); cp.add(input); cp.add(output); input.addActionListener(new EnterKeyHandler()); addWindowListener(new WindowCloser()); } /* The actionPerformed method of this inner class will be called whenever the enter key is pressed in the input field. */ public class EnterKeyHandler implements ActionListener { public void actionPerformed(ActionEvent e) { double tc = Double.parseDouble(input.getText().trim()); double tf = (9.0/5.0)*tc + 32.0; output.setText("" + tf); } } /* Construct an application and make it visible */ public static void main(String[] args) { JFrame f = new Temperature(); f.setVisible(true); } }
A JTextField object is limited to displaying one line of text.
If the text is too long for the field it can be scrolled left or right.
To obtain a multi-line field it is necessary to use a JTextArea component
object which appears as a rectangular area in the window.
These objects do not automatically provide for scrolling up and down or left and
right in case the text does not fit the rectangular area.
Therefore the text area will be added to a JScrollPane object to
provide the scroll bars if needed.
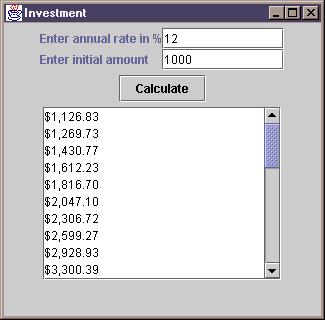
As an illustration let us develop an application for displaying the future value of an investment given an annual rate $r$ in percent, and an initial investment amount $a$. We will assume that interest is compounded monthly so the future value f of the investment after n years (12n months) is
           /         r   \  12n
   f  = a |   1  + ----   |
           \        1200 /
The application will provide input fields for the rate $r$ and the initial amount $a$
and will display the future value for years 1 to 30 in a JTextArea object.
The Enter key cannot be used to signal that the input has been entered since
there are now two input fields.
Instead we will use a button to signal that the results should be calculated.
We need 6 component objects: a label called prompt1 and its associated
input field called rateField for the annual rate r, another
label called prompt2 and its associated input field
called amountField for the initial amount a, a button called
calculate to press when the input data has been entered, and finally an
output text area called output to display the iterations.
The application frame should appear as in
Figure 9 after the data has been entered and the
calculate button has been pressed.
The following statements declare references to the six GUI objects:
private JLabel prompt1;
private JLabel prompt2;
private JTextField rateField;
private JTextField amountField;
private JButton calculate;
private JTextArea output;
In the constructor they can be initialized using the statements
prompt1 = new JLabel("Enter annual rate in %");
rateField = new JTextField("12", 10);
prompt2 = new JLabel("Enter initial amount");
amountField = new JTextField("1000", 10);
calculate = new JButton("Calculate");
output = new JTextArea(10,20); // 10 rows and 20 columns
output.setEditable(false);
Here we have used another variation of the JTextField constructor that has
two arguments: the first is a string that should appear in the field initially, and
the second is the approximate field width in characters.
In our example the default initial rate is 12 and the
default initial amount is 1000.
In Figure 9 the two input boxes and their prompts line up in the form of a two by two grid. If you add the components to the application using the statements
Container cp = getContentPane();
cp.setLayout(new FlowLayout());
cp.add(prompt1);
cp.add(rateField);
cp.add(prompt2);
cp.add(amountField);
cp.add(calculate);
cp.add(output);
you won't be able to achieve this grid style layout by resizing the frame. Also, as mentioned above, if the text area becomes too small text will be lost since the text area object does not scroll.
To obtain the grid style layout for the first four GUI components it is first
necessary to use a JPanel object that uses a
GridLayout manager.
The purpose of a JPanel object is to organize components.
The following statements can be used to obtain the layout shown in Figure 9.
JPanel p = new JPanel();
p.setLayout(new GridLayout(2,2));
p.add(prompt1);    // add prompt to panel in row 1, column 1
p.add(rateField);  // add rateField to panel in row 1, column 2
p.add(prompt2);    // add prompt2 to panel in row 2, column 1
p.add(amountField); // add amountField to panel in row 2, column 2
The first two statements define a
JPanel object that will lay out its four
components using a 2 by 2 grid specified by a GridLayout manager.
Instead of six components we now have only three: the panel, the calculate
button and the output text area.
These three components can be added to the
content pane of the frame using the FlowLayout manager with the statements
Container cp = getContentPane();
cp.setLayout(new FlowLayout());
cp.add(p); // add the panel
cp.add(calculate);
cp.add(new JScrollPane(output));
The last statement constructs a
JScrollPane object for the
output text area and adds it to the content pane.
Now scroll bars will appear in either or both directions if needed.
The heart of the investment application is a method called doIterations
which obtains the yearlyRate and initialAmount by getting the
strings in the two input fields and converting them to double numbers.
Then a for-loop is used to calculate the future value at the end of each year
for 30 years:
public void doIterations()
{
   NumberFormat currency = NumberFormat.getCurrencyInstance();
   double yearlyRate =
      Double.parseDouble(rateField.getText().trim());
   double initialAmount =
      Double.parseDouble(amountField.getText().trim());

   output.setText(""); // clear text in area

   double amount = initialAmount;
   for (int year = 1; year <= 30; year++)
   {
      amount = futureValue(amount, yearlyRate, 1);
      output.append(currency.format(amount) + "\n");
   }
}
Here we use a currency object that knows how to format numbers.
In an English locale numbers are formatted with commas
separating the thousands,
a dollar sign prefix,
and rounding to the nearest cent.
To make the NumberFormat class available it is necessary to
use the import statement
import java.text.NumberFormat;at the top of the class.
There are two methods which can be used to display text in a text area.
The setText method works the same as for text fields. It replaces
all the text in the text area by the given text. It is used in the above
method to clear any text from a previous calculation:
output.setText("");
To display text in the text area we do not use the familiar print and
println console output methods.
Instead the append method is used.
It adds text at the end of any text already displayed in the area.
To obtain a new line it is necessary to use \n in the string.
Therefore, in the doIterations method the statement
output.append(currency.format(amount) + "\n");is used to display the amount and move to the next line. Finally, an inner class can be used to implement the
ActionListener
interface.
Here is the complete investment application class.
Class Investment/* PURPOSE: A gui application for the future value of an investment */ import booklib.WindowCloser; import java.text.NumberFormat; import java.awt.*; import java.awt.event.*; import javax.swing.*; import javax.swing.event.*; public class Investment extends JFrame { private JLabel prompt1; private JLabel prompt2; private JTextField rateField; private JTextField amountField; private JButton calculate; private JTextArea output; public Investment() { setTitle("Investment"); setSize(325,320); prompt1 = new JLabel("Enter annual rate in %"); rateField = new JTextField("12", 10); prompt2 = new JLabel("Enter initial amount"); amountField = new JTextField("1000", 10); calculate = new JButton("Calculate"); output = new JTextArea(10,20); // 10 rows and 20 columns output.setEditable(false); JPanel p = new JPanel(); p.setLayout(new GridLayout(2,2)); p.add(prompt1); p.add(rateField); p.add(prompt2); p.add(amountField); Container cp = getContentPane(); cp.setLayout(new FlowLayout()); cp.add(p); cp.add(calculate); cp.add(new JScrollPane(output)); calculate.addActionListener(new CalculateButtonHandler()); addWindowListener(new WindowCloser()); doIterations(); // do calculations for default initial values } public void doIterations() { NumberFormat currency = NumberFormat.getCurrencyInstance(); double yearlyRate = Double.parseDouble(rateField.getText().trim()); double initialAmount = Double.parseDouble(amountField.getText().trim()); output.setText(""); // clear text in area double amount = initialAmount; for (int year = 1; year <= 30; year++) { amount = futureValue(amount, yearlyRate, 1); output.append("$" + currency.format(amount).substring(1) + "\n"); } } public static double futureValue(double amount, double yearlyRatePercent, int years) { double monthlyRate = yearlyRatePercent / 100.0 / 12.0; double a = amount * Math.pow(1.0 + monthlyRate, 12 * years); return a; } /* The actionPerformed method of this inner class will be called whenever the calculate button is clicked, and it calls the doCalculations method. */ public class CalculateButtonHandler implements ActionListener { public void actionPerformed(ActionEvent e) { doIterations(); } } /* Construct an application and make it visible */ public static void main(String[] args) { JFrame f = new Investment(); f.setVisible(true); } }
calculate button is clicked the system will call the
actionPerformed method and the calculations will be performed.
An interesting feature in this program is the doIterations call
at the end of the constructor.
This means that when the application runs it will do the calculations
automatically for the given default values without having to click the button.
One of the deficiencies of a JTextField object is that it only provides
a getText method to return the text in the field as a string.
In many applications, such as Investment, the fields are interpreted
either as int or double values.
It would be nice to have getInt and getDouble methods that
would automatically convert the data typed in a text field to an int
value and a double value, respectively.
Also, if a user types a non-numeric value in a field that is expecting a
numeric value then a NumberFormatException occurs.
A simple way to prevent this is to catch the exception and simply replace the
invalid input typed in the field by the number 0 or an error string.
We can easily obtain a smarter text field by using inheritance to extend
the JTextField class.
We will call our subclass InputJTextField.
To make it more complete we will also provide getLong and
getFloat methods for converting to the long
and float types and we will provide a getString
method which is like getText
except that leading and trailing spaces will be removed.
According to the documentation for the JTextField class
its basic structure is
public class JTextField extends JTextComponent implements SwingConstants
{
   public JTextField() {...}
   public JTextField(String text) {...}
   public JTextField(int columns) {...}
   public JTextField(String text, int columns) {...}
   // other methods that will be inherited
}
Since constructors are not inherited we can design our subclass to have the
same four kinds of constructors.
Therefore our subclass will have the structure
public class InputJTextField extends JTextField
{
   public InputJTextField() {...}
   public InputJTextField(String text) {...}
   public InputJTextField(int columns) {...}
   public InputJTextField(String text, int columns) {...}

   // Here are our new methods

   public int getInt() {...}
   public long getLong() {...}
   public float getFloat() {...}
   public double getDouble() {...}
   public String getString() {...}
}
Since we are not introducing any new data fields
the constructors can easily be implemented with the appropriate super
constructor call expression.
To implement getInt we can use a try-catch block:
public int getInt()
{
   try
   {
      return Integer.parseInt(getText().trim());
   }
   catch (NumberFormatException e)
   {
      setText("0");
      return 0;
   }
}
The other three get methods are similar.
Here is the complete class for the booklib package.
Class InputJTextFieldpackage booklib; import javax.swing.*; /** * An InputJTextField is just like a JTextField but it provides methods * for reading int, long, float and double numbers in the field: * getInt(), getLong(), getFloat(), and getDouble() return the contents * of the TextField as in int, long, float, or a double. * A clear() method for clearing the text in the field is also provided * <p> * EXAMPLE * <pre> * InputJTextField field = new InputJTextField(20); * ... * int n = field.getInt(); // return field as an int * long l = field.getLong(); // return field as a long * float f = field.getFloat(); // return field as a float * double d = field.getDouble(); // return field as a double * </pre> * For completeness a method for getting a string is also * provided. getString() corresponds to getText() except that leading and * trailing blanks are removed. */ public class InputJTextField extends JTextField { /** * Same as corresponding JTextField constructor */ public InputJTextField() { super(); } /** * Same as corresponding JTextField constructor */ public InputJTextField(String s) { super(s); } /** * Same as corresponding JTextField constructor */ public InputJTextField(int columns) { super(columns); } /** * Same as corresponding JTextField constructor */ public InputJTextField(String s, int columns) { super(s, columns); } /** Return contents of the field as an int. @return the contents of the field as an int */ public int getInt() { try { return Integer.parseInt(getText().trim()); } catch (NumberFormatException e) { setText("0"); return 0; } } /** Return contents of the field as a long int. @return the contents of the field as a long int @throws NumberFormatException */ public long getLong() { try { return Long.parseLong(getText().trim()); } catch (NumberFormatException e) { setText("0"); return 0; } } /** Return the contents of the field as a float. @return the contents of the field as a float @throws NumberFormatException */ public double getFloat() { try { return Float.parseFloat(getText().trim()); } catch (NumberFormatException e) { setText("0"); return 0; } } /** Return the contents of the field as a double. @return the contents of the field as a double @throws NumberFormatException */ public double getDouble() { try { return Double.parseDouble(getText().trim()); } catch (NumberFormatException e) { setText("0"); return 0; } } /** Return the contents of the field as a String with leading and trailing blanks are removed. @return the contents of the field as a String with leading and trailing spaces removed. */ public String getString() { return getText().trim(); } }
We can use this class to write a new version of the Investment application:
Simply replace the two JTextField objects rateField and
amountField with InputJTextField objects.
In the doIterations method replace the second and third statements with
double yearlyRate = rateField.getDouble();
double initialAmount = amountField.getDouble();
In Chapter 7 we developed the LoanRepaymentTable class
that produced a loan repayment table.
This class was made more reusable in Chapter 9
by having it return the table using the toString method.
We wrote a console application class LoanRepaymentTableRunner
to run the class.
Now we want to produce a GUI version called LoanRepaymentTableGUI.
The important idea is that the LoanRepaymentTable class that
was used for the console version can be used unchanged for the GUI version:
it's a 'plug and play' component.
To make a GUI for this class we need four input fields,
a calculate button to trigger the calculations,
and a text area to hold the table output.
When the calculate button is clicked the actionPerformed method is called
and all calculations are done using the method
public void doCalculations()
{
   double a = loanAmountField.getDouble();
   int y = yearsField.getInt();
   int p = paymentsPerYearField.getInt();
   double r = annualRateField.getDouble();
   LoanRepaymentTable table = new LoanRepaymentTable(a,y,p,r);
   output.setText(table.toString());
}
where a is the loan amount,
y is the number of years,
p is the number of payments per year,
and r is the annual interest rate in percent.
These values are obtained from four InputJTextField objects.
Then if output is the name of a JTextArea
object the loan repayment table's toString method
can be used to display the table in the text area.
We also need to set the font that displays text in the output area. The default font is not a mono-spaced font so the columns will not line up properly. The statement
output.setFont(new Font("Courier", Font.PLAIN, 11));
is used to change the output text area font to Courier, which is a mono-font,
using plain style (rather than bold) and using a size of 11 points.
Here is the complete GUI class.
Class InputJTextField/* PURPOSE: A GUI interface for the LoanRepaymentTable class */ import booklib.LoanRepaymentTable; import booklib.InputJTextField; import booklib.WindowCloser; import java.text.NumberFormat; import java.awt.*; import java.awt.event.*; import javax.swing.*; import javax.swing.event.*; public class LoanRepaymentTableGUI extends JFrame implements SwingConstants { private JLabel loanAmountLabel; private InputJTextField loanAmountField; private JLabel yearsLabel; private InputJTextField yearsField; private JLabel paymentsPerYearLabel; private InputJTextField paymentsPerYearField; private JLabel annualRateLabel; private InputJTextField annualRateField; private JButton calculate; private JTextArea output; public LoanRepaymentTableGUI() { setTitle("Loan Repayment"); setSize(500,450); // Construct the four input text fields and their labels loanAmountLabel = new JLabel("Loan amount", CENTER); loanAmountField = new InputJTextField("10000", 10); yearsLabel = new JLabel("Years", CENTER); yearsField = new InputJTextField("10", 5); paymentsPerYearLabel = new JLabel("Payments/year", CENTER); paymentsPerYearField = new InputJTextField("2", 5); annualRateLabel = new JLabel("Annual rate %", CENTER); annualRateField = new InputJTextField("10", 10); // Construct button that causes calculations to be performed calculate = new JButton("Calculate"); // Construct the output text area and choose a mono-spaced font // so the columns will line-up properly output = new JTextArea(20,60); // 10 rows and 20 columns output.setEditable(false); output.setFont(new Font("Courier", Font.PLAIN, 11)); // Add input fields and labels to a panel in a 2 by 4 grid JPanel p = new JPanel(new GridLayout(2,4)); p.add(loanAmountLabel); p.add(loanAmountField); p.add(yearsLabel); p.add(yearsField); p.add(paymentsPerYearLabel); p.add(paymentsPerYearField); p.add(annualRateLabel); p.add(annualRateField); // Add panel, button, and scrollable text area to frame's content pane Container cp = getContentPane(); cp.setLayout(new FlowLayout()); cp.add(p); cp.add(calculate); cp.add(new JScrollPane(output)); // Add the listeners to button and frame calculate.addActionListener(new CalculateButtonHandler()); addWindowListener(new WindowCloser()); // initialize calculations for default set of input values doCalculations(); } public void doCalculations() { double a = loanAmountField.getDouble(); int y = yearsField.getInt(); int p = paymentsPerYearField.getInt(); double r = annualRateField.getDouble(); LoanRepaymentTable table = new LoanRepaymentTable(a,y,p,r); output.setText(table.toString()); } // A class to implement the actionPerformed method which will be called // when the calculate button is pressed. public class CalculateButtonHandler implements ActionListener { public void actionPerformed(ActionEvent e) { doCalculations(); } } public static void main(String[] args) { JFrame f = new LoanRepaymentTableGUI(); f.setVisible(true); } }

The LoanRepaymentTableGUI class illustrates a useful feature of interfaces
we have not encountered yet: it implements an interface
called SwingConstants.
Recall that interfaces can also contain static constants.
The SwingConstants interface in package javax.swing
is an example.
It declares no method prototypes, only constants, and looks like
public interface SwingConstants
{
   public static final int CENTER = 0;
   public static final int TOP = 1;
   public static final int LEFT = 2;
   public static final int RIGHT = 3;
   // several other constants
}
We have used a two-argument JLabel constructor (see documentation)
whose second argument is one of these constants indicating that the
label should be centered in its field.
The default value used by the one-argument constructor is RIGHT.
If we hadn't specified that the class implements the SwingConstants
interface then we would have to use the qualified name SwingConstants.CENTER
for this constant instead of its short name.
Thus, interfaces provide a way to collect together a group of
related constants so they can easily be used with their unqualified names
in any class that implements the interface.
As another interesting problem let us
write an application called Conversions to convert numbers from one unit
to another.
There will be an input text field for the number to convert and an output text
field for the converted result.
We can use our custom InputJTextField for the input field.
Each type of conversion, such as centimetres to inches or miles to kilometres
will be represented by a button.
We will implement twelve different types of conversions using three rows of four buttons.
The initial application frame is shown in Figure 11.
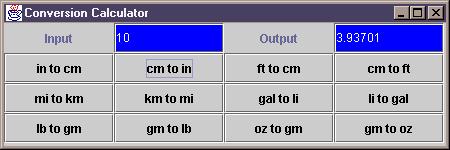
The frame contains a JPanel containing 16 components laid out in
a four by four grid using a GridLayout manager.
The first row is different from the others and the remaining rows can each
have 4 buttons.
Corresponding to these buttons there will be an array of strings for the
button names and an array of double numbers for the conversion factors.
Here are the private data fields for our Conversions class:
private InputJTextField input;    // source amount
private JTextField output;        // converted amount
private JLabel inputLabel;
private JLabel outputLabel;

private String[] buttonNames = {"in to cm", "cm to in", "ft to cm",
   "cm to ft", "mi to km", "km to mi", "gal to li", "li to gal",
   "lb to gm", "gm to lb", "oz to gm", "gm to oz"};

private double[] factor = {2.54, 1/2.54, 30.5,
   1/30.5, 1.609, 1/1.609, 3.785, 1/3.785,
   453.6, 1/453.6, 28.3495, 1/28.3495};
The four fields in the top row are declared first.
They provide for the input text field, the output text field and labels for
each of them.
Next come the arrays for the 12 types of conversions.
The first, buttonNames, provides an array of button labels indicating
the type of conversion.
The next gives the conversion factor to use.
For example the factor 2.54
is the conversion factor from inches to centimetres.
These components are constructed and initialized inside the Conversions
constructor.
The labels and text fields are constructed with the statements
inputLabel = new JLabel("Input", CENTER);
input = new InputJTextField("1", 10);
outputLabel = new JLabel("Output", CENTER);
output = new JTextField(10);
Next we need to determine how many rows of buttons there are (3 rows for 12 types
of conversions).
To make it easy to modify the application to include more or less than 12 types
of conversions the number of rows can be computed using
int rows = buttonNames.length / 4;
if (buttonNames.length % 4 != 0)
   rows++;
Next we can define a JPanel with GridLayout
manager and lay out the first row of components:
JPanel p = new JPanel();
p.setLayout(new GridLayout(rows + 1, 4));
p.add(inputLabel);
p.add(input);
p.add(outputLabel);
p.add(output);
Finally we can use a loop to construct the buttons,
use a custom JButtonHandler inner class to associate button i
with an actionPerformed method, add the buttons to the panel,
and then add the panel to the content pane of the frame:
for (int i = 0; i < buttonNames.length; i++)
{
   JButton b = new JButton(buttonNames[i]);
   b.addActionListener(new JButtonHandler(i));
   p.add(b);
}
Container contentPane = getContentPane();
contentPane.add(p);
Notice that the JButtonHandler class
has a constructor with one argument, i,
which is the index of the button.
It is not necessary to have an array of buttons and button handlers since the
panel will keep track of the buttons and
to assign a handler to button i we use new JButtonHandler(i).
The inner class is given by
public class JButtonHandler implements ActionListener
{
   private int buttonIndex;

   public JButtonHandler(int index)
   {
      buttonIndex = index;
   }

   public void actionPerformed(ActionEvent e)
   {
      Format f = new Format(1, 5, Format.LEFT);
      double in = input.getDouble();
      double out = in * factor[buttonIndex];
      output.setText(f.format(out));
   }
}
Thus, the index encapsulated by an object of this class can be used as
an index into the array of conversion factors in the actionPerformed
method so the conversion from input units to output units is given by
double out = in * factor[buttonIndex];If we had not included a constructor having the button index as argument then we would need an array of buttons, one handler for all buttons, and a for-loop in its
actionPerformed method that uses getSource
to determine which button was clicked.
Here is the complete application class:
Class Conversions/* PURPOSE: Conversion from one system of units to another using buttons */ import booklib.WindowCloser; import booklib.Format; import booklib.InputJTextField; import java.awt.*; import java.awt.event.*; import javax.swing.*; import javax.swing.event.*; public class Conversions extends JFrame implements SwingConstants { private InputJTextField input; // source amount private JTextField output; // converted amount private JLabel inputLabel; private JLabel outputLabel; private String[] buttonNames = {"in to cm", "cm to in", "ft to cm", "cm to ft", "mi to km", "km to mi", "gal to li", "li to gal", "lb to gm", "gm to lb", "oz to gm", "gm to oz"}; private double[] factor = {2.54, 1/2.54, 30.5, 1/30.5, 1.609, 1/1.609, 3.785, 1/3.785, 453.6, 1/453.6, 28.3495, 1/28.3495}; public Conversions() { setTitle("Conversion Calculator"); setSize(450,150); inputLabel = new JLabel("Input", CENTER); input = new InputJTextField("1", 10); outputLabel = new JLabel("Output", CENTER); output = new JTextField(10); input.setBackground(Color.blue); input.setForeground(Color.white); output.setBackground(Color.blue); output.setForeground(Color.white); // determine number of rows of buttons int rows = buttonNames.length / 4; if (buttonNames.length % 4 != 0) rows++; // Construct a panel with a grid layout for the top input/output // row and the rows of buttons. JPanel p = new JPanel(); p.setLayout(new GridLayout(rows + 1, 4)); p.add(inputLabel); p.add(input); p.add(outputLabel); p.add(output); // Construct buttons, add listeners to them, and add them to the panel // Each listener constructor has an argument defining the button number. for (int i = 0; i < buttonNames.length; i++) { JButton b = new JButton(buttonNames[i]); b.addActionListener(new JButtonHandler(i)); p.add(b); } // Finally, add the panel to the frame's content pane Container contentPane = getContentPane(); contentPane.add(p); addWindowListener(new WindowCloser()); } // Handler for button i, i=0,1,2,... Each instance encapsulates a // button index which is an index into the conversion factor array. public class JButtonHandler implements ActionListener { private int buttonIndex; public JButtonHandler(int index) { buttonIndex = index; } public void actionPerformed(ActionEvent e) { Format f = new Format(1, 5, Format.LEFT); double in = input.getDouble(); double out = in * factor[buttonIndex]; output.setText(f.format(out)); } } public static void main(String[] args) { JFrame f = new Conversions(); f.setVisible(true); } }
In Chapter 10 we discussed inheritance, polymorphism and interfaces. We now give further examples using the GUI classes.
We have seen that an event handler for processing button clicks or the pressing
of the Enter key in a text field is an object from a class that implements the
ActionListener interface.
This means that such an event handler 'is a type of' ActionListener.
To add an event handler to a component, such as a button or text field,
we use the component's addActionListener method which has the prototype
public void addActionListener(ActionListener obj)The argument here is polymorphic in the sense that
obj can be an object
from any class that implements the ActionListener interface.
This interface is defined in the java.awt.event package (its full
name is java.awt.event.ActionListener} as
public interface ActionListener extends EventListener
{
   public void actionPerformed(ActionEvent e);
}
Therefore a class that implements the ActionListener interface only needs
to implement the actionPerformed method.
This example also shows that interfaces, like classes, can be extended:
ActionListener extends the EventListener interface.
If you look at documentation for the EventListener superinterface you
will see that it has the form
public interface EventListener
{
}
There are no methods to implement here:
the EventListener interface simply serves as the superinterface for
all listener interfaces such as ActionListener and
WindowListener and many others as well.
It is called a 'tagging interface'.
This interface defines methods which are called when a window, such as a
JFrame,
is opened or closed using the minimize, maximize, and close buttons.
The WindowListener interface in package java.awt.event
is more complicated than the ActionListener interface
because it declares seven methods instead of one.
It is defined by
public interface WindowListener extends EventListener
{
   public void windowClosing(WindowEvent e);
   public void windowActivated(WindowEvent e);
   public void windowClosed(WindowEvent e);
   public void windowDeactivated(WindowEvent e);
   public void windowDeiconified(WindowEvent e);
   public void windowIconified(WindowEvent e);
   public void windowOpened(WindowEvent e);
}
Any class that implements this interface must implement all seven methods.
This can be inconvenient since normally we don't need all seven methods.
In our case we are only interested in the windowClosing method.
As a convenience the WindowAdapter class in package
java.awt.event is available as an adapter class.
It implements the interface by simply providing empty bodies for
the seven methods:
public class WindowAdapter implements WindowListener
{
   public void windowClosing(WindowEvent e) {}
   public void windowActivated(WindowEvent e) {}
   public void windowClosed(WindowEvent e) {}
   public void windowDeactivated(WindowEvent e) {}
   public void windowDeiconified(WindowEvent e) {}
   public void windowIconified(WindowEvent e) {}
   public void windowOpened(WindowEvent e) {}
}
We have implemented the WindowListener interface with our
WindowCloser class (Chapter 11)
simply by extending the WindowAdapter class
in package java.awt.event
and overriding just the windowClosing method:
import java.awt.event.WindowAdapter;
import java.awt.event.WindowEvent;
public class WindowCloser extends WindowAdapter
{
   public void windowClosing(WindowEvent e)
   {
      System.exit(0);
   }
}
We have used this class in our GUI programs
when we used the statement
addWindowListener(new WindowCloser());The prototype for the
addWindowListener method of the
Window class, a superclass of JFrame, is
public void addWindowListener(WindowListener obj)We used a similar technique in Chapter 10 when we introduced the
ShapeAdaper class that implements the ten methods in the Shape
interface using a GeneralPath object.
Another way to obtain windows that close is to extend the
JFrame class with a class called CloseableJFrame
which has the structure
public class CloseableJFrame extends JFrame implements WindowListener
{
    // data fields, constructors and methods
    // implementations of the 7 WindowListener methods
}
Now we can write our GUI programs using this class instead of the
JFrame class.
For example,
assuming that CloseableJFrame has been placed
in the booklib package,
the ApplicationTemplate at the beginning of this chapter can
be written as
import booklib.CloseableJFrame;
import java.awt.*;
import java.awt.event.*;
import javax.swing.*;
import javax.swing.event.*;

public class ApplicationTemplate extends CloseableJFrame
{
   // Declare instance variables for GUI components here
   // Declare any other instance or class variables here

   public static void main(String[] args)
   {
      JFrame f = new ApplicationTemplate();
      f.setVisible(true);
   }

   public ApplicationTemplate()
   {
      setTitle("Put your frame title here");

      // Statements to create GUI components go here
      // Statements to add them to the frame go here
      // statements to add action listeners go here

      setSize(400,300);
   }

   public void actionPerformed(ActionEvent e)
   {
      // statements to process action events go here
   }
}
Now there is no need to have it implement the WindowListener interface
and there is no need for the statement
addWindowListener(new WindowCloser());in the constructor since our
CloseableJFrame
objects know how to close the window.
Here is the CloseableJFrame class:
Class CloseableJFramepackage booklib; import java.awt.event.WindowListener; import java.awt.event.WindowEvent; import javax.swing.JFrame; /** A class that provides window closing when close button is clicked. Extend this class instead of JFrame. */ public class CloseableJFrame extends JFrame implements WindowListener { /** Construct a frame with an empty title. */ public CloseableJFrame() { this(""); } /** Construct a frame with specified title. @param title the text for the title bar */ public CloseableJFrame(String title) { super(title); addWindowListener(this); } /* This method is called when the user clicks the close box of a window. Here we just exit the program */ public void windowClosing(WindowEvent e) { System.exit(0); } /* These 6 methods are part of the WindowListener interface but have empty bodies. */ public void windowActivated(WindowEvent e) {} public void windowClosed(WindowEvent e) {} public void windowDeactivated(WindowEvent e) {} public void windowDeiconified(WindowEvent e) {} public void windowIconified(WindowEvent e) {} public void windowOpened(WindowEvent e) {} }
This class provides two constructors and an implementation of the
WindowListener interface that closes the frame when the close box is
clicked.
Constructing an object of this class automatically adds the object as
the window listener.
Notice that we had to implement the WindowListener interface directly,
rather than extend the WindowAdapter class,
since our class is already extending JFrame
and cannot also extend WindowAdapter.
To illustrate how to use the CloseableJFrame class we write a GUI application
to calculate the average mark for a student.
We assume that each student has marks for several tests.
We want to enter the marks and compute the average and then process
another set of marks for another student.
If we write a console application we need to use nested loops as
the following program shows:
Class MarkAverageConsole/* PURPOSE: A console application for calculating mark averages. A series of marks for a student are entered and terminated by a negative sentinel mark. Then the user is asked if a set of marks for another student is to be entered. No loops are needed in GUI version. */ import booklib.KeyboardReader; public class MarkAverageConsole { public MarkAverageConsole() { KeyboardReader input = new KeyboardReader(); // Outer loop processes one of more students boolean moreStudents = true; while (moreStudents) { // Inner loop processes marks for a student double sumMarks = 0; int numMarks = 0; System.out.println("Enter marks for a student"); double mark = input.readDouble(); while (mark >= 0) { sumMarks = sumMarks + mark; numMarks = numMarks + 1; mark = input.readDouble(); } double avg = sumMarks / numMarks; double avg2 = Math.round(100*avg) / 100.0; System.out.println("Average is " + avg2); System.out.println("More students Y/N ?"); char reply = input.readLine().toUpperCase().charAt(0); if (reply == 'N') moreStudents = false; } } public static void main(String[] args) { new MarkAverageConsole(); } }
For the GUI version of this program no loops are required. The event-driven programming model takes care of this automatically. We can use a button instead of a sentinel value. Clicking this button is the signal that the marks for a student have been entered and the average should be computed. Then if an average for another student is desired a new set of marks can be entered. Figure 12 shows what the GUI application will look like after one set of marks has been entered and Figure 13 shows the situation after another set of marks has been entered.


Each time a mark is entered in the input text field it is copied to the output text area. When the button is clicked the average is calculated and displayed. Then another set of marks can be entered. As shown in Figure 13, the output area automatically scrolls if necessary.
The application contains four components: a label, a field for entering a mark, a button, and a text area. These components can be declared using
private JLabel prompt;
private InputJTextField markField;
private JButton calculate;
private JTextArea output;
and created in the constructor using
prompt = new JLabel("Enter next mark", CENTER);
markField = new InputJTextField("", 10);
calculate = new JButton("Calculate Average");
output = new JTextArea(10,15); // 10 rows and 10 columns
output.setEditable(false);
A 3 row and 1 column grid layout panel can be used to organize the label, text field and button in a vertical line. This panel and the text area can be added to the content pane using a flow layout manager:
JPanel p = new JPanel();
p.setLayout(new GridLayout(3,1));
p.add(prompt);
p.add(markField);
p.add(calculate);
Container cp = getContentPane();
cp.setLayout(new FlowLayout());
cp.add(p);
cp.add(new JScrollPane(output));
pack();
We have added the output text field to a JScrollPane object so that
vertical scroll bars will appear if necessary.
We have not used pack before.
There are two ways to specify the size of the frame that holds our components.
We have been using setSize to do this in our previous GUI applications.
Another way is to use pack instead of setSize.
This causes the window to be sized to fit the preferred size and layout of
the components.
We have not used pack previously since its effect with
the flow layout manager would be to try to put all components on one line and
this would not have looked good.
However for the MarkAverageGUI application it has the effect of putting the
three by one panel and the text area side by side in a frame that just fits
and this is what we want.
If desired the window can also be resized to move the text area below the button.
The next step is to add action listeners for the button click and for the pressing of the Enter key in the text field. We can use the following inner classes to do this:
public class NextMarkFieldHandler implements ActionListener
{
   public void actionPerformed(ActionEvent e)
   {
      addMark();
   }
}

public class CalculateButtonHandler implements ActionListener
{
   public void actionPerformed(ActionEvent e)
   {
      calculateAverage();
   }
}
The addMark method will be called when the Enter key is pressed.
It simply adds the mark to the running sum, increments a counter for
the number of marks, copies the mark to the output text area, and clears
the input text field in preparation for entering the next mark:
public void addMark()
{
   double mark = markField.getDouble();
   sumMarks = sumMarks + mark;
   numMarks++;
   markField.setText("");
   output.append(mark + "\n");
}
Finally, the calculateAverage method computes the average mark for
a student and displays the result in the output text field rounded to
two decimal places:
public void calculateAverage()
{
   double avg = sumMarks / numMarks;
   double avg2 = Math.round(100*avg) / 100.0;
   output.append("Average is " + avg2 + "\n");
   initialize();
}
It also calls an initialize method defined by
public void initialize()
{
   numMarks = 0;
   sumMarks = 0.0;
   markField.setText("");
}
that prepares for the computation of an average for another student.
This method can also be used in the constructor to initialize the GUI.
Here is the complete application class:
Class MarkAverageGUI/* PURPOSE: GUI version of MarksAverageConsole. */ import booklib.CloseableJFrame; import booklib.InputJTextField; import java.awt.*; import java.awt.event.*; import javax.swing.*; import javax.swing.event.*; public class MarkAverageGUI extends CloseableJFrame implements SwingConstants { private JLabel prompt; private InputJTextField markField; private JButton calculate; private JTextArea output; private double sumMarks = 0.0; private int numMarks = 0; public MarkAverageGUI() { setTitle("Average Mark Calculator"); prompt = new JLabel("Enter next mark", CENTER); markField = new InputJTextField("", 10); calculate = new JButton("Calculate Average"); output = new JTextArea(10,15); // 10 rows and 10 columns output.setEditable(false); JPanel p = new JPanel(); p.setLayout(new GridLayout(3,1)); p.add(prompt); p.add(markField); p.add(calculate); Container cp = getContentPane(); cp.setLayout(new FlowLayout()); cp.add(p); cp.add(new JScrollPane(output)); /* Pack causes the window to be sized to fit the preferred size and layouts of its components. */ pack(); markField.addActionListener(new NextMarkFieldHandler()); calculate.addActionListener(new CalculateButtonHandler()); initialize(); } /* Prepare for calculation of average for a new student */ public void initialize() { numMarks = 0; sumMarks = 0.0; markField.setText(""); } public void calculateAverage() { double avg = sumMarks / numMarks; double avg2 = Math.round(100*avg) / 100.0; output.append("Average is " + avg2 + "\n"); initialize(); } public void addMark() { double mark = markField.getDouble(); sumMarks = sumMarks + mark; numMarks++; markField.setText(""); output.append(mark + "\n"); } public class NextMarkFieldHandler implements ActionListener { public void actionPerformed(ActionEvent e) { addMark(); } } public class CalculateButtonHandler implements ActionListener { public void actionPerformed(ActionEvent e) { calculateAverage(); } } public static void main(String[] args) { JFrame f = new MarkAverageGUI(); f.setVisible(true); } }
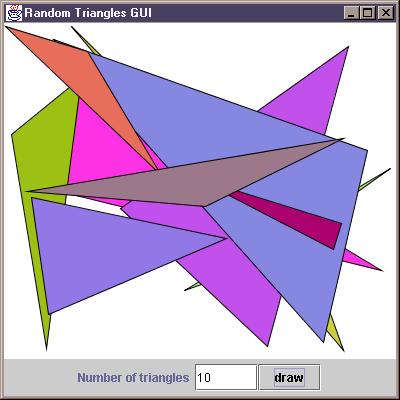
In Chapter 10 we wrote a RandomTriangles class
using a command line argument
to get the number of random triangles to draw.
If no command line argument was supplied then 10 triangles were drawn.
Since RandomTriangles is a JPanel then, rather than use
command line arguments and putting this panel in a GraphicsFrame,
we can use a text field to input the number of triangles to draw and
use a button to signal that the window should be refreshed to use the
number in this text field.
Thus, the GUI components are the graphics panel, a label, a text field and a button.
We can think of the last three components as forming a control panel which
we can place along the bottom of the frame as shown in Figure 14.
Above it we can place the RandomTriangles graphics panel.
The control panel will be an object from a ControlPanel class that
extends JPanel.
It contains a JLabel, an InputJTextField,
and a JButton object,
and will communicate with the application class using
a getValue method that returns the value typed in the text field.
The class is given by
Class ControlPanel/* PURPOSE: A control panel containing a prompt, input text field and a button. */ import booklib.InputJTextField; import java.awt.*; import java.awt.event.*; import java.awt.geom.*; import javax.swing.*; import javax.swing.event.*; public class ControlPanel extends JPanel { private JButton button; private JLabel prompt; private InputJTextField inputField; public ControlPanel(String promptString, String buttonLabel, int value) { button = new JButton(buttonLabel); prompt = new JLabel(promptString); inputField = new InputJTextField("" + value, 5); // Use grid layout to make text field and button the same size JPanel p = new JPanel(); p.setLayout(new GridLayout(1,2)); p.add(inputField); p.add(button); // put prompt and grid into flow layout (centered is default) setLayout(new FlowLayout()); add(prompt); add(p); } public void addActionListener(ActionListener a) { button.addActionListener(a); } public int getValue() { return inputField.getInt(); } }
Panels don't have action listeners.
They are just used to organize the layout of components and for drawing graphics.
However we need an addActionListener method here because our panel
should respond when the button is clicked.
It is easy to write this method: we can have it just add the listener to the
button.
We have also made ControlPanel more general than it needs to
be in this application by using general arguments in the constructor.
This class could be reused in any situation where there is a labeled text
field and a button to control it.
Now we need to write the RandomTrianglesGUI application class.
It contains an object called trianglePanel
from the RandomTriangles class
and a ControlPanel called controlPanel.
It can implement the ActionListener interface and repaint the graphics
panel when the draw button is clicked.
The RandomTriangles class from Chapter 10 can be used unchanged.
This is an excellent example of two interacting objects:
the controlPanel object has a getValue
method to return the value
typed in the text field and the trianglePanel object has a
setNumTriangles method to set the number of triangles that should be drawn.
Thus, they can communicate using the statement
trianglePanel.setNumTriangles(controlPanel.getValue());This gives the following inner class with an
actionPerformed
method which will be called whenever the control panel's button is clicked.
public class ControlPanelHandler implements ActionListener
{
   public void actionPerformed(ActionEvent e)
   {
      trianglePanel.setNumTriangles(controlPanel.getValue());
      trianglePanel.repaint();
   }
}
The repaint method will cause the graphics
panel's paintComponent
method to be called and this will draw a new set of triangles.
To arrange that the graphics panel fills the entire frame above the control
panel we will use a BorderLayout
for the RandomTrianglesGUI class.
A BorderLayout manager uses five areas of the screen (north, south, east,
west, and center) to lay out components.
It is not necessary to use all five regions.
In any case the center region always expands to use all space
not required by the border regions.
Therefore the control panel can be added in the south region and the graphics panel
can be added to the center region.
Here is the complete class.
Class RandomTrianglesGUI/* PURPOSE: To show how to place a graphics panel in a frame and have it controlled using a control panel rather than console input. */ import booklib.CloseableJFrame; import java.awt.*; import java.awt.event.*; import javax.swing.*; import javax.swing.event.*; public class RandomTrianglesGUI extends CloseableJFrame { private ControlPanel controlPanel; private RandomTriangles trianglePanel; public RandomTrianglesGUI() { setTitle("Random Triangles GUI"); controlPanel = new ControlPanel("Number of triangles", "draw", 10); trianglePanel = new RandomTriangles(10); Container cp = getContentPane(); cp.setLayout(new BorderLayout()); cp.add("Center", trianglePanel); cp.add("South", controlPanel); controlPanel.addActionListener(new ControlPanelHandler()); setSize(400,400); } /* The actionPerformed method of this inner class will be called whenever the control panel's button is clicked. */ public class ControlPanelHandler implements ActionListener { // When the control panel's button is clicked, get the value typed // in the text field and give it to the RandomTriangles object using // its setNumTriangles method. public void actionPerformed(ActionEvent e) { trianglePanel.setNumTriangles(controlPanel.getValue()); trianglePanel.repaint(); } } public static void main(String[] args) { JFrame f = new RandomTrianglesGUI(); f.setVisible(true); } }
This application class shows why we needed to include
an addActionListner method
in the ControlPanel class.
We could have designed all the components into this class and not
used a separate ControlPanel class, but using this class
shows how to separate the user interaction part of the application from
the output part (graphics display).
Many of the graphics programs we have written since Chapter 5 could now be
rewritten,
using RandomTrianglesGUI as a model,
to get their input from the GUI rather than the command line or
a KeyboardReader object.
We have used the GraphicsFrame class many times since it made simple
graphics programs easy to write.
It is another good example of inheritance.
Recall that classes using GraphicsFrame have the overall structure
public class MyClass extends JPanel
{
   // data fields go here

   public void main(String[] args)
   {
      new GraphicsFrame("Title goes here", new MyClass(), 401, 301);
   }

   // other methods go here
}
Here the GraphicsFrame constructor arguments are a title string,
an instance of the graphics panel class MyClass,
and its width and height in pixels.
Now a MyClass object 'is a' JPanel object
and a JPanel object 'is a' JComponent object
so the GraphicsFrame class has the specification
package booklib;
import java.awt.*;
import java.awt.event.*;
import javax.swing.*;
public class GraphicsFrame extends JFrame implements WindowListener
{

   public GraphicsFrame(JComponent c) {...}
   public GraphicsFrame(String title, JComponent c) {...}
   public GraphicsFrame(JComponent c, int w, int h) {...}
   public GraphicsFrame(String title, JComponent c, int w, int h) {...}

   // implementation of the WindowListener interface goes here
   // other methods if needed go here
}
Here the first statement is a package statement indicating that this
is the version of the GraphicsFrame class
that belongs to the booklib
package (this statement is not present in the version used in Chapters 1 to 8).
Also, four constructors are provided and they use a JComponent as
one of the formal arguments to make the class slightly more general.
Because of inheritance we can use a JPanel object as an actual
argument since a JPanel object 'is a' JComponent object.
We have always used the fourth form of the constructor.
The first three constructors are just special cases of the last so the implementations of the first three constructors in terms of the fourth one are
public GraphicsFrame(JComponent c)
{
   this(c.getClass().getName(), c, 400, 400);
}

public GraphicsFrame(String title, JComponent c)
{
   this(title, c, 400, 400);
}

public GraphicsFrame(JComponent c, int w, int h)
{
   this(c.getClass().getName(), c, w, h);
}
Default values have been chosen for one or more of the arguments.
We have not used the getClass method
from the Object class before
but it can be used here to obtain the name of the JPanel class
to use as a default frame title.
The general constructor needs to add the JComponent to the
frame and set its width and height using the given values.
It also needs to set the title and add the window listener to the frame.
We also allow for more than one window on the screen so a static variable
called numWindows defined by
private static int numWindows = 0;is used to keep track of the number of windows currently open. When a window is closed we do not exit the program unless this was the last window. This is a good example of a static variable being used as a counter for how many times a class has been instantiated.
The implementation of the general constructor is given by
public GraphicsFrame(String title, JComponent c, int w, int h)
{
   super();
   setTitle(title);
   addWindowListener(this);
   c.setPreferredSize(new Dimension(w,h));
   getContentPane().add("Center", c);
   pack();
   center();
   setVisible(true);
   numWindows++;
}
There are a few new features here.
First the setPreferredSize method is used
on the JComponent called
c to set the preferred size of the component
using w and h.
This method requires a Dimension object as argument.
The Dimension class in java.awt
is just a simple class that lets
you specify the width and height of components using a single object variable
rather than two integer values.
It is also convenient for returning a pair of width and height values as the
value of a method (see getSize in the center method below).
The data fields width and height are public variables so if
d is a Dimension object then d.width
is the width and d.height is the height.
Next c is added to the center of the content pane of the frame.
Recall that the default layout manager for a frame is BorderLayout not
FlowLayout.
This layout manager identifies north, south, east, west, and center positions
of a frame or other component,
so we specify that the component should go in the center of the frame.
Since there are no other components for north, south, east, or west,
the component fills all the space in the frame.
Next it is necessary to use pack to indicate that the frame should be
chosen just large enough to contain the added components (only c in our
case).
Finally, since frames normally appear in the top left corner of the screen
and we want them to appear in the center of the screen, a local center
method is called to do this.
The counter for the number of windows already open is incremented by one each
time a new window is constructed.
Then each time a window is closed it is decremented by one in the
windowClosing method which now has the form
public void windowClosing(WindowEvent e)
{
   numWindows--;
   e.getWindow().dispose();
   if (numWindows == 0)
      System.exit(0);
}
Thus, the exit method is only called when the last open window is closed.
Otherwise we simply dispose of the window and its memory resources.
This is done using the getWindow method in the WindowEvent
class to find out which window to close.
Here is the complete class with javadoc comments.
Class GraphicsFramepackage booklib; import java.awt.*; import java.awt.event.*; import javax.swing.*; /** A simple class to set up a graphics frame on which to draw graphics. @author Barry G. Adams @version 1.1 July 2000 */ public class GraphicsFrame extends JFrame implements WindowListener { private static int numWindows = 0; /** Construct a graphics frame with drawing surface of width 400 pixels and height 400 pixels. @param c the component on which to draw (normally a JPanel object). */ public GraphicsFrame(JComponent c) { this(c.getClass().getName(), c, 400, 400); } /** Construct a graphics frame with drawing surface of width 400 pixels and height 400 pixels. @param title title appearing in the window title bar. @param c the component on which to draw (normally a JPanel object). */ public GraphicsFrame(String title, JComponent c) { this(title, c, 400, 400); } /** Construct a graphics frame with drawing surface of width w pixels and height h pixels. @param c the component on which to draw (normally a JPanel object). @param w width of drawing surface in pixels. @param h height of drawing surface in pixels. */ public GraphicsFrame(JComponent c, int w, int h) { this(c.getClass().getName(), c, w, h); } /** Construct a graphics frame with drawing surface of width w pixels and height h pixels. @param title title appearing in the window title bar. @param c the component on which to draw (normally a JPanel object). @param w width of drawing surface in pixels. @param h height of drawing surface in pixels. */ public GraphicsFrame(String title, JComponent c, int w, int h) { super(); setTitle(title); addWindowListener(this); c.setPreferredSize(new Dimension(w,h)); getContentPane().add("Center", c); pack(); center(); setVisible(true); numWindows++; // one more window on the screen } /* This method is called when the user clicks the close box of a window. Here we just exit the program */ public void windowClosing(WindowEvent e) { numWindows--; e.getWindow().dispose(); if (numWindows == 0) System.exit(0); } /* These 6 methods are part of the WindowListener interface but have empty bodies. */ public void windowActivated(WindowEvent e) {} public void windowClosed(WindowEvent e) {} public void windowDeactivated(WindowEvent e) {} public void windowDeiconified(WindowEvent e) {} public void windowIconified(WindowEvent e) {} public void windowOpened(WindowEvent e) {} private void center() { Dimension screenSize = getToolkit().getScreenSize(); Dimension frameSize = getSize(); int xLocation = (screenSize.width - frameSize.width) / 2; int yLocation = (screenSize.height - frameSize.height) / 2; setLocation(xLocation, yLocation); } }
The center method uses some fancy tricks to get the screen size and frame
size as Dimension objects using the getToolkit method
and then setLocation to position the top left corner of the
frame so that the frame is centered in the screen.
Java application classes are divided into two categories. The first consists of the console and GUI applications that we have written so far. The second consists of GUI applets. It is also possible to write a class that functions both as a GUI application and as an applet.
Applets are special GUI classes that are executed by a Web browser
instead of the java interpreter.
They are compiled in the same way as other Java
classes using the javac command.
Each applet is specified on a web page using a special HTML applet tag which
specifies the class file to run and the width and height in pixels of the applet.
This area corresponds to the JPanel that we have used in our graphical
programs. When the browser finds this tag it allocates the required rectangular
area on the screen, loads the specified applet class file (byte codes) and runs
the applet.
A template for the simple applets we shall discuss is given by
import java.awt.*;
import java.awt.event.*;
import java.awt.geom.*;
import javax.swing.*;
public class MyApplet extends JApplet
{
   // declare variables and GUI components

   public void init()
   {
       // code to execute when the applet is initialized
   }

   public void start() {...}
   public void stop() {...}
   public void destroy() {...}

   // other methods can go here
}
This is not the most general form of an applet.
There are no constructors in an applet.
Instead we override the init method of JApplet.
When the browser runs an applet it executes the init method to initialize
and display the applet.
Therefore any code that normally goes in a constructor is now placed
in the init method.
There are other methods that are essential for some applets.
The browser calls the start method
each time the user loads the page containing
the applet, and it calls the stop method when the browser loads a new page.
The destroy method is called by the browser
to perform any clean-up tasks when an applet is being terminated.
Many other applet-specific methods are available.
For the simplest applets only the init method is required.
As an example, let us write an applet called RGBColorApplet
that lets us type in three RGB color codes in
the range 0 to 255 and display the corresponding color.
We will write our class so that it functions both as a GUI application and an applet.
We need a way to test applets since most browsers so far do not support Java 2 applets.
A special appletviewer program is provided as part of the Java 2 SDK.
This program is like a 'no-frills' browser whose sole purpose is to test applets.
It requires that a short HTML file be written that has an applet tag
containing the name of the class file, RGBColorApplet.class in our case,
and the width and height in pixels of the rectangular panel for the applet.
If you write a file with the name TestRGBColorApplet.html that contains
<APPLET CODE = "RGBColorApplet.class" WIDTH = 400 HEIGHT = 150>
<PARAM NAME = "redValue"  VALUE = "125">
<PARAM NAME = "greenValue"  VALUE = "205">
<PARAM NAME = "blueValue"  VALUE = "125">
</APPLET>
then the command
appletviewer TestRGBColorApplet.htmltells
appletviewer to look in the HTML file for the applet tag
giving the class to load and the size of the applet.
The applet tag can also be used to parameterize an applet by specifying the
initial values of some variables using name-value pairs.
Here we use three PARAM tags.
Each specifies a string for the name of the parameter and a value for this
parameter.
The applet can read these values using its getParameter method.
This is analogous to the command line arguments for console applications.
Unlike the Java interpreter,
the appletviewer program and the web browser completely ignore any
classpath you have set since it is doubtful that someone half way around
the world will be using your classpath.
Only the directory containing the applet class file is searched for
custom packages,
so in our case we put a copy of the booklib directory
in the directory that contains RGBColorApplet.class.
RGBColorApplet window is shown in Figure 15.
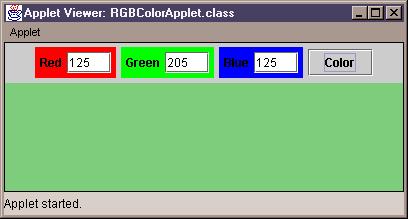
We will write the applet so that it can also be run as GUI application using the standard Java interpreter. It is very easy to do this for any applet. Then the command to run the application is
java RGBColorAppletand the output window is shown in Figure 16.
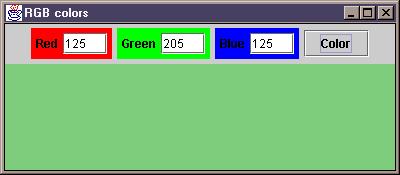
The figures show that the frame contains two top-level panels. The top panel is called the control panel, and the large bottom panel is called the color panel. These two panels are declared using
private JPanel controlPanel;
private JPanel colorPanel;
The control panel also contains three panels, each containing a color label and an input text field, and a color button.
The control panel's three labels, three text fields, and color button are declared using
private JLabel redLabel;
private JLabel greenLabel;
private JLabel blueLabel;
private InputJTextField redField;
private InputJTextField greenField;
private InputJTextField blueField;
private JButton colorButton;
The color panel will show the selected color as its background color when the button is clicked.
To get the red, green and blue background rectangles for the labels and text fields
it is necessary to put each label and text field in its own panel and set the
background color of the panel.
Therefore in the init method we can construct the control panel and its
components.
For example, the following statements define the red label, text field,
and its red panel.
redLabel = new JLabel("Red", JLabel.CENTER);
redLabel.setForeground(Color.black);
redField = new InputJTextField(redValue, 4);
JPanel pRed = new JPanel();
pRed.add(redLabel);
pRed.add(redField);
pRed.setBackground(Color.red);
The variable redValue will be a string containing the initial red value.
It is obtained from the PARAM tag specified in the applet tag.
Similarly we can define panels pGreen and pBlue.
The button is constructed using
colorButton = new JButton("Color");
The control panel uses the FlowLayout manager and can be constructed
with the statements
controlPanel = new JPanel();
controlPanel.setLayout(new FlowLayout());
controlPanel.add(pRed);
controlPanel.add(pGreen);
controlPanel.add(pBlue);
controlPanel.add(colorButton);
and the color panel can be constructed with the statement
colorPanel = new JPanel();
Next, the control panel and the color panel need to be added to the applet.
We can use the BorderLayout manager and put the control panel in the
north position and the color panel in the center position so that it fills
the remaining space.
The statements to do this are
Container cp = getContentPane();
cp.setLayout(new BorderLayout());
cp.add(controlPanel, "North");
cp.add(colorPanel, "Center");
Finally, the init method needs to add a listener to the button.
We will do this using an inner class and the statement
colorButton.addActionListener(new ColorButtonHandler());The inner class needs an
actionPerformed method to read the three color
codes from the input text fields and use them to set a new background color
for the color panel.
This class is given by
public class ColorButtonHandler implements ActionListener
{
   public void actionPerformed(ActionEvent e)
   {
      changeColor();
   }
}
where the changeColor method is given by
public void changeColor()
{
   int red = redField.getInt();
   int green = greenField.getInt();
   int blue = blueField.getInt();
   Color c = new Color(red, green, blue);
   colorPanel.setBackground(c);
   repaint();
}
The repaint method is important since it tells the event manager that it
should request an update of the components on the screen to reflect the
new background color.
This has the effect of calling the paintComponent method of the panel.
Since an applet does not have a frame inside the browser window we can
put a one pixel border rectangle around the applet panel.
For applets this is not done using the paintComponent method but
with the paint method.
Therefore we include
public void paint(Graphics g)
{
   super.paint(g);
   Graphics2D g2D = (Graphics2D) g;
   Shape border = new Rectangle2D.Double(0,0,getWidth()-1, getHeight()-1);
   g2D.setPaint(Color.black);
   g2D.draw(border);
}
You can see this border in Figure 15 and Figure 16.
Finally, we need to read the three initial values for the red, green, and
blue components from the parameter fields in the applet tag.
This is done in the init method using
try
{
   redValue = getParameter("redValue");
   greenValue = getParameter("greenValue");
   blueValue = getParameter("blueValue");
}
catch (NullPointerException n)
{
   redValue = "125";
   greenValue = "205";
   blueValue = "125";
}
The argument of the getParameter method
specifies the parameter name as a string as defined by the name part of
the parameter tag and the return value is the value of this parameter as
specified by the value part of the parameter tag.
The try block is necessary in case the applet tag has no parameter tags
or in case it is run as an application using the main method.
This is all we need to write an applet.
But if we also want to run the applet as a standalone application we need a
main method that can create a frame and put our applet in it.
This can be done as follows:
public static void main(String[] args)
{
   RGBColorApplet a = new RGBColorApplet();
   a.setSize(400,150);
   a.init();
   JFrame f = new JFrame();
   Container cp = f.getContentPane();
   cp.add(a);
   f.addWindowListener(new WindowCloser());
   f.setTitle("RGB colors");
   f.setSize(400,175);
   f.setVisible(true);
}
We are in effect writing a 'no-frills' appletviewer or browser here.
First an applet object is constructed and initialized by calling its
init method.
Then a JFrame object called f is created and the applet
object is added to its content pane.
Finally, we add a window listener, a title, a size for the frame, and we make the frame visible. For a pure applet class we do not need to worry about closing the frame since the applet viewer or the browser takes care of this. Here is the complete applet class:
Class RGBColorApplet/* PURPOSE: An applet for calculating RGB color values that can also be run as an application. */ import booklib.WindowCloser; import booklib.InputJTextField; import java.awt.*; import java.awt.event.*; import java.awt.geom.*; import javax.swing.*; public class RGBColorApplet extends JApplet { private JLabel redLabel; private JLabel greenLabel; private JLabel blueLabel; private InputJTextField redField; private InputJTextField greenField; private InputJTextField blueField; private JPanel controlPanel; private JPanel colorPanel; private JButton colorButton; private String redValue, greenValue, blueValue; public void init() { try // get parameters from applet tag { redValue = getParameter("redValue"); greenValue = getParameter("greenValue"); blueValue = getParameter("blueValue"); } catch (NullPointerException n) { redValue = "125"; greenValue = "205"; blueValue = "125"; } // Put red label and text field in panel and set panel's background color redLabel = new JLabel("Red", JLabel.CENTER); redLabel.setForeground(Color.black); redField = new InputJTextField(redValue, 4); JPanel pRed = new JPanel(); pRed.add(redLabel); pRed.add(redField); pRed.setBackground(Color.red); // Similarly for a green label and text field greenLabel = new JLabel("Green", JLabel.CENTER); greenLabel.setForeground(Color.black); greenField = new InputJTextField(greenValue,4); JPanel pGreen = new JPanel(); pGreen.add(greenLabel); pGreen.add(greenField); pGreen.setBackground(Color.green); // Similarly do a black label and text field blueLabel = new JLabel("Blue", JLabel.CENTER); blueLabel.setForeground(Color.black); blueField = new InputJTextField(blueValue, 4); JPanel pBlue = new JPanel(); pBlue.add(blueLabel); pBlue.add(blueField); pBlue.setBackground(Color.blue); colorButton = new JButton("Color"); // Construct the control panel and add color panels to it controlPanel = new JPanel(); controlPanel.setLayout(new FlowLayout()); controlPanel.add(pRed); controlPanel.add(pGreen); controlPanel.add(pBlue); controlPanel.add(colorButton); // Construct a color panel colorPanel = new JPanel(); // Add control panel and color panel to the applet's content pane // using a border layout. The control panel is at the top of the // frame and the color panel fills the remainder of the frame. Container cp = getContentPane(); cp.setLayout(new BorderLayout()); cp.add(controlPanel, "North"); cp.add(colorPanel, "Center"); colorButton.addActionListener(new ColorButtonHandler()); changeColor(); } /* Put a one pixel black rectangle around applet panel */ public void paint(Graphics g) { super.paint(g); Graphics2D g2D = (Graphics2D) g; Shape border = new Rectangle2D.Double(0,0,getWidth()-1, getHeight()-1); g2D.setPaint(Color.black); g2D.draw(border); } /* Inner class containing actionPerformed method to be called when the color button in the control panel is clicked */ public class ColorButtonHandler implements ActionListener { public void actionPerformed(ActionEvent e) { changeColor(); } } /* Get RGB values, set background of the color panel to this color. */ public void changeColor() { int red = redField.getInt(); int green = greenField.getInt(); int blue = blueField.getInt(); Color c = new Color(red, green, blue); colorPanel.setBackground(c); repaint(); } public static void main(String[] args) { // Construct an applet object and initialize it RGBColorApplet a = new RGBColorApplet(); a.setSize(400,150); a.init(); // Construct frame and add applet to its content pane JFrame f = new JFrame(); Container cp = f.getContentPane(); cp.add(a); f.addWindowListener(new WindowCloser()); f.setTitle("RGB colors"); f.setSize(400,175); f.setVisible(true); } }
Unfortunately if you try to use TestRGBColorApplet.html with a browser
the applet will not appear.
The reason is that most browsers don't have the latest versions of Java.
Current popular browsers such as Internet Explorer 5.5 and Netscape Navigator 4.7
support only Java 1.1, not the Java 2 versions 1.2 or 1.3.
However, Netscape 6 has been recently introduced and it directly supports
Java 2 using the applet tag.
Sun Microsystems has created a Java Plug-In
and HTML converter tool which you can download from www.javasoft.com.
This installs the latest version of the JRE (Java run-time environment) on your
computer and you can tell the browser to use this JRE rather than the browser's
internal version.
This is done using a much more complicated HTML tag.
The HTMLConverter tool is used to search an
HTML file and convert all the applet tags to the new form.
For example, TestRGBColorApplet.html can be converted to a file
we will call RGBColorApplet.html and the result is the rather
formidable file
<!--"CONVERTED_APPLET"-->
<!-- CONVERTER VERSION 1.3 -->
<OBJECT classid="clsid:8AD9C840-044E-11D1-B3E9-00805F499D93"
WIDTH = 400 HEIGHT = 150
codebase=
"http://java.sun.com/products/plugin/1.3/jinstall-13-win32.cab#Version=
1,3,0,0">
<PARAM NAME = CODE VALUE = "RGBColorApplet.class" >
lt;PARAM NAME="type" VALUE="application/x-java-applet;version=1.3">
<PARAM NAME="scriptable" VALUE="false">
<PARAM NAME = "redValue" VALUE  = "125">
<PARAM NAME = "greenValue" VALUE  = "205">
<PARAM NAME = "blueValue" VALUE  = "125">
<COMMENT>
<EMBED type="application/x-java-applet;version=1.3"
CODE = "RGBColorApplet.class" WIDTH = 400 HEIGHT = 150
redValue =  "125" greenValue =  "205" blueValue =  "125"
scriptable=false pluginspage=
"http://java.sun.com/products/plugin/1.3/plugin-install.html">
<NOEMBED></COMMENT></NOEMBED></EMBED>
</OBJECT>
<!--
<APPLET CODE = "RGBColorApplet.class" WIDTH = 400 HEIGHT = 150>
<PARAM NAME = "redValue" VALUE  = "125">
<PARAM NAME = "greenValue" VALUE  = "205">
<PARAM NAME = "blueValue" VALUE  = "125">
</APPLET>
-->
<!--"END_CONVERTED_APPLET"-->
That's why the
HTMLConverter tool is supplied.
Now the RGB color applet will run in both Internet Explorer and Netscape.
A picture of the applet running in Internet Explorer is shown in
Figure 17.
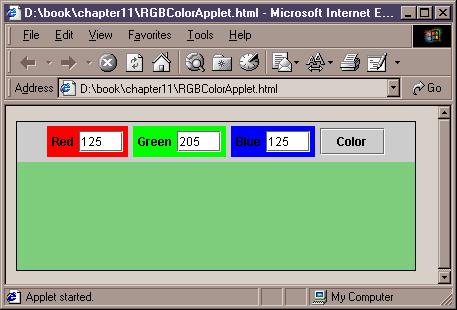
It is also possible to run a java application from an applet.
As a simple example we write a small applet called
ApplicationLauncher that contains only a button
whose purpose is to launch the RandomTrianglesGUI application,
considered earlier in this chapter,
when the button is clicked.
The application appears in a separate frame and
can be closed and terminated by clicking the applet button again.
The button will act like a toggle between launching the application and
terminating the application.
When the HTML page containing the button is replaced by a new page
or when the browser is closed the application will also be terminated.
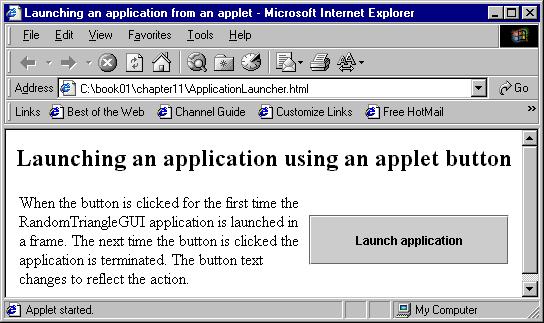
The HTML file shown in the browser window is
<html>
<title>Launching an application from an applet
<body>
<h2>Launching an application using an applet button
<table>
<tr>
<td>
When the button is clicked for the first time the RandomTriangleGUI
application is launched in a frame. The next time the button is clicked
the application is terminated. The button text changes to reflect the action.
</td>
<td>
<!--"CONVERTED_APPLET"-->
<!-- CONVERTER VERSION 1.3 -->
<OBJECT classid="clsid:8AD9C840-044E-11D1-B3E9-00805F499D93"
WIDTH = 200 HEIGHT = 50
codebase=
"http://java.sun.com/products/plugin/1.3/jinstall-13-win32.cab#Version=1,3,0,0">
<PARAM NAME = CODE VALUE = "ApplicationLauncher.class" >
<PARAM NAME="type" VALUE="application/x-java-applet;version=1.3">
<PARAM NAME="scriptable" VALUE="false">
<COMMENT>
   <EMBED type="application/x-java-applet;version=1.3"
   CODE = "ApplicationLauncher.class"
   WIDTH=200 HEIGHT=50
   scriptable=false
   pluginspage="http://java.sun.com/products/plugin/1.3/plugin-install.html">
   <NOEMBED>
</COMMENT>
</NOEMBED></EMBED>
</OBJECT>
<!--
<APPLET CODE = "ApplicationLauncher.class" WIDTH=200 HEIGHT=50>
</APPLET>
-->
<!--"END_CONVERTED_APPLET"-->
</td>
</tr>
</table>
</body>
</html>
Here is the applet class
Class ApplicationLauncher/* PURPOSE: To show how to launch GUI application from a JApplet using a button. When the button is clicked the frame appears. When the button is clicked again the frame is destroyed. */ import java.awt.*; import java.awt.event.*; import java.awt.geom.*; import javax.swing.*; public class ApplicationLauncher extends JApplet implements ActionListener { JFrame f; JButton launchButton; public void init() { f = null; launchButton = new JButton("Launch application"); Container cp = getContentPane(); cp.setLayout(new BorderLayout()); cp.add(launchButton, "Center"); launchButton.addActionListener(this); } /* This method is called when browser terminates the applet. */ public void destroy() { if (f != null) f.dispose(); } /* This method is called when the launcher button is clicked. The button acts like a toggle. */ public void actionPerformed(ActionEvent e) { if (f == null) // create application, display it { f = new RandomTrianglesGUI(); f.setVisible(true); launchButton.setText("Terminate application"); } else // dispose of frame to terminate application { f.dispose(); f = null; launchButton.setText("Launch application"); } } }
The init method simply creates a button which fills the area allocated
for the applet since the border layout is used.
The actionPerformed method can detect whether the application
object exists by testing its reference to see if it is null, in which
case it creates the application in a JFrame and makes it visible.
Otherwise the application is terminated.
The text on the button is changed dynamically using the setText
method to indicate what happens when the button is clicked.
It is necessary to dispose of the application using the dispose
method when the browser is closed or visits a new page.
In this section we summarize some of the built-in Java classes used in this chapter. For more complete documentation see the Java SDK HTML documentation.
java.awt.Component
|
+--- java.awt.Container
     |
     +--- java.awt.Window
          |
          +--- java.awt.Frame
               |
               +--- javax.swing.JFrame
public class JFrame extends java.awt.Frame implements ...
{
   // Construct a new frame that is initially invisible
   public JFrame()
   // Construct a new frame that is initially invisible with given title
   public JFrame(String title)
   // return a reference to the frame's content pane (it's a container)
   // components are added to the content pane instead of the JFrame itself
   public java.awt.Container getContentPane()
   // set the layout manager for the frame
   public void setLayout(java.awt.LayoutManager manager)


   // METHODS INHERITED FROM SUPERCLASSES

   // Set a new title for the frame
   public void setTitle(String title)
   // set the size of the frame
   public void setSize(int width, int height)
   // set top left frame location to (x,y)
   public void setLocation(int x, int y)
   // size window using preferred size of its components
   public void pack()
   // Make the frame visible
   public void show()
   // show the window if b is true (same as show) else hide it
   public void setVisible(boolean b)
   // add component c to the frame's content pain
   public java.awt.component add(java.awt.Component c)
   // add a window listener to the frame
   public void addWindowListener(java.awt.event.WindowListener lis)
}
java.awt.Component
|
+--- java.awt.Container
     |
     +--- javax.swing.JComponent
          |
          +--- javax.swing.JPanel
public class JPanel extends java.awt.Component implements ...
{
   // Construct a panel (default manager is FlowLayout)
   public JPanel()
   // Construct a panel with given layout manager
   public JPanel(java.awt.LayoutManager manager)

   // METHODS INHERITED FROM SUPERCLASSES

   // set the layout manager for a panel
   public void setLayout(java.awt.LayoutManager manager)
   // add component c to the panel
   public java.awt.Component add(java.awt.Component c)
   // return width in pixels of panel
   public int getWidth()
   // return height in pixels of panel
   public int getHeight()
   // set the preferred size in pixels of the panel
   public void setPreferredSize(java.awt.Dimension size)
   // set foreground color of panel
   public void setBackground(java.awt.Color bg)
   // set background color of panel
   public void setForeground(java.awt.Color fg)
   // for drawing graphics on a panel
   protected void paintComponent(Graphics g)
}
java.awt.Component
|
+--- java.awt.Container
     |
     +--- javax.swing.JComponent
          |
          +--- javax.swing.JLabel
public class JLabel extends javax.swing.JComponent implements ...
{
   // construct a label with given text (right justified)
   public JLabel(String text)
   // construct a label with given text and alignment
   // (javax.swing.SwingConstants.LEFT, javax.swing.SwingConstants.RIGHT,
   // javax.swing.SwingConstants.CENTER)
   public JLabel(String text, int horizontalAlignment)
}
java.awt.Component
|
+--- java.awt.Container
     |
     +--- javax.swing.JComponent
          |
          +--- javax.swing.AbstractButton
               |
               +--- javax.swing.JButton
public class JButton extends javax.swing.AbstractButton implements ...
{
   // construct a button with given text
   public JButton(String text)
   // add an action listener to the button
   public void addActionListener(java.awt.event.ActionListener lis)
   // set the button text to given string
   public void setText(String text)
}
java.awt.Component
|
+--- java.awt.Container
     |
     +--- javax.swing.JComponent
          |
          +--- javax.swing.text.JTextComponent
               |
               +--- javax.swing.JTextComponent
public class JTextField extends javax.swing.JTextComponent implements ...
{
   // constructors to specify default text and approx width in characters
   public JTextField()
   public JTextField(int columns)
   public JTextField(String text)
   public JTextField(String text, int columns)
   // add an action listener to the text field
   public void addActionListener(java.awt.event.ActionListener lis)

   // METHODS INHERITED FROM SUPERCLASSES

   // set the text in the field to the given string
   public void setText(String text)
   // return the text in the field
   public String getText()
}
java.awt.Component
|
+--- java.awt.Container
     |
     +--- javax.swing.JComponent
          |
          +--- javax.swing.text.JTextComponent
               |
               +--- javax.swing.JTextArea
public class JTextArea extends javax.swing.JTextComponent implements ...
{
   // constructors to specify default text
   // and the approx width and height in characters
   public JTextArea()
   public JTextArea(String text)
   public JTextArea(int rows, int columns)
   public JTextArea(String text, int rows, int columns)
   // append given text to the text area
   public void append(String text)

   // METHODS INHERITED FROM SUPERCLASSES

   // set the text in the field to the given string
   public void setText(String text)
   // return the text in the field
   public String getText()
}
 GUI                       component            event listener
 event-driven programming  text field           text area
 listener list             EventListener        ActionListener
 ActionEvent               WindowListener       WindowEvent
 JFrame                    JComponent           JPanel
 JLabel                    JButton              JTextField
 InputJTextField           JTextArea            JScrollPane
 layout manager            FlowLayout           BorderLayout
 GridLayout                content pane         addActionListener
 addWindowListener         inner class          add
 getSource                 actionPerformed      SwingConstants
 CloseableJFrame           Applet
Exercise 1 (GUI version of DoubleYourMoney)
Write a GUI version of the doubling your money program (Chapter 7).
Provide two InputJTextField objects
for getting the initial investment and the annual interest rate in percent.
Use a button that will perform the calculations when it is clicked and
display the results in a scrollable JTextArea object.
Exercise 2 (A GUI version of InvestmentTable)
We did a GUI version of the loan repayment program called
LoanRepaymentTableGUI,
using the reusable LoanRepaymentTable class
which returned the table using toString.
Write a GUI version of the investment program using the reusable
InvestmentTable class, Chapter 9,
that returns the table using toString.
Your application frame should look as close as possible to the frame shown in Figure 19.
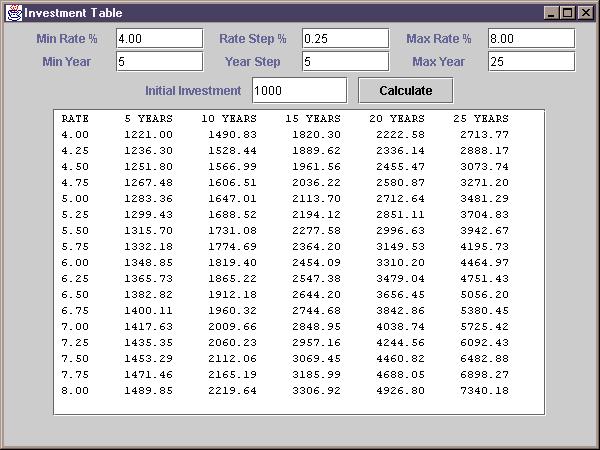
Exercise 3 (GUI version of ChangeMaker)
Write a GUI version of a change maker program called ChangeMakerGUI.
Your application frame should look as close as possible to the frame
shown in Figure 20.

The checkout person enters the amount due and the amount received by the customer.
When the calculate button is pressed the change is displayed as shown in the
text area.
Use an inner class to implement the ActionListener interface.
Exercise 4 (A better GUI version of ChangeMaker)
Make a better version of ChangeMakerGUI that does not display zero values.
For example, for the values shown in Figure 20 the dollars
and nickels rows would not be shown at all.
Also this version should check the input carefully: amounts entered should be
non-negative and the amount received should be greater or equal to
the amount due.
Display appropriate messages in the text area for illegal input.
Exercise 5 (A modification to RGBColorApplet)
Modify RGBColorApplet
so that pressing the enter key in any of the three text
fields also triggers a repaint of the color panel.
Exercise 6 {A GUI application version of RGBColorApplet)
The RGBColorApplet class was written to work both as an applet and a GUI
application.
Write a version called RGBColorGUI that works only as an application.
Exercise 7 (An applet version of InvestmentTableGUI)
Write an applet version of InvestmentTableGUI
called InvestmentTableApplet and write an HTML
file for it using HTMLConverter so that it will run in a browser
(you can modify the file RGBColorApplet.html to use
InvestmentTableApplet.class and change the width and height values).
Exercise 8 (Launching applications using applet buttons)
Using the ApplicationLauncher class as a guide,
write an applet class called ProgramLauncher that
contains several buttons.
Each button should launch an application class in a frame.
Use some of the applications in this chapter.