NOTE: These tutorial were done using Eclipse version 3.1
NOTE: In these tutorials we install Eclipse, workspaces and other
files related to the tutorials in a directory called
c:\eclipse31. If you are using another directory such
as your home directory
c:\Documents and Settings\username\eclipse31
you will need to replace c:\eclipse31
everywhere with your directory.
Objective
Customizing the Java Editor
Next Tutorial: Exporting Projects
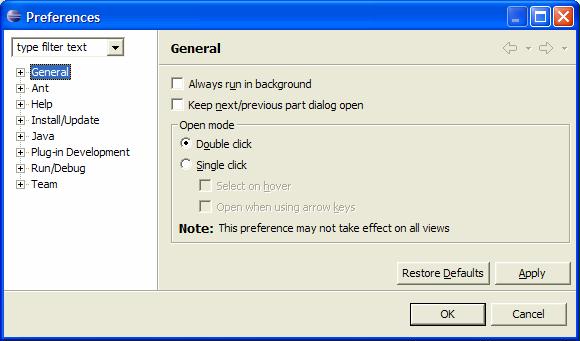
To customize Eclipse choose "Preferences" from the "Windows" menu to get the dialog box
Each item in the list on the left corresponds to one or more configuration dialogs on the right.
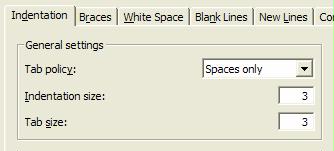
For example, let us customize the editor to use 3 spaces for indentation instead of the default 4 spaces and to use spaces instead of tab characters for indentation.
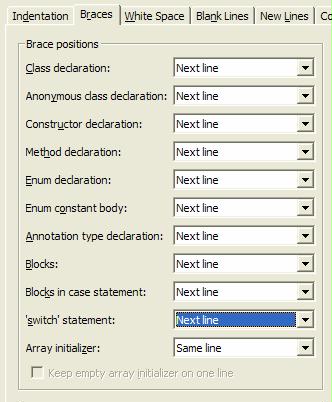
Also the default alignment of braces in templates is
   for (int k = 1; k <= 10; k++) {
      // statements
   }
and we want to change it to the more readable style
   for (int k = 1; k <= 10; k++)
   {  // statements
   }
which keeps the braces lined up underneath each other.
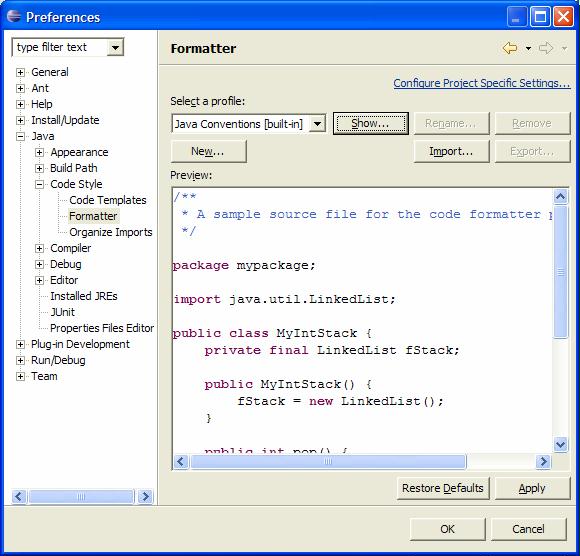
To make these changes first navigate to the "Formatter" item in the list and in the "Select a pofile" drop down box choose "Java Conventions" to obtain
Now click the "Show..." button, select the "Indentation" tab and change the tab size to 3 and use spaces for tabs as shown:
Now select the "Braces" tab and change most of the "same line" entries to "Next line":
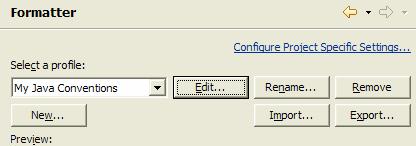
Now click "OK" and give your new profile a name such as "My Java Conventions". Your conventions will now appear in the "Select a Profile" drop-down box:
You can edit your preferences at any time by clicking the "Edit..." button. Click "OK" to exit preferences.