NOTE: These tutorial were done using Eclipse version 3.1
NOTE: In these tutorials we install Eclipse, workspaces and other
files related to the tutorials in a directory called
c:\eclipse31. If you are using another directory such
as your home directory
c:\Documents and Settings\username\eclipse31
you will need to replace c:\eclipse31
everywhere with your directory.
geoproject
and geotesterproject in your workspace.
Objective
Exporting a Project as a Zip File
Exporting a Project as a File System
Exporting an Application as a JAR File
Next Tutorial: Importing Projects
In this tutorial we show how to export a project as a zip file or a file system and how to export a Java application in a project as a JAR file so that it can be run outside the Eclipse environment.
If you want to archive a project or give it to someone else
you can export it as a zip file.
As an example let us use the project geoproject that
we created in the introductory
tutorial.
From the "Package Explorer" select geoproject.
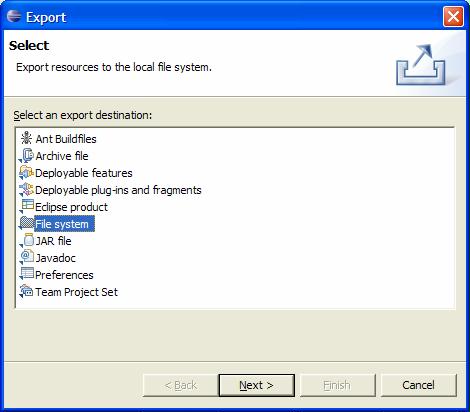
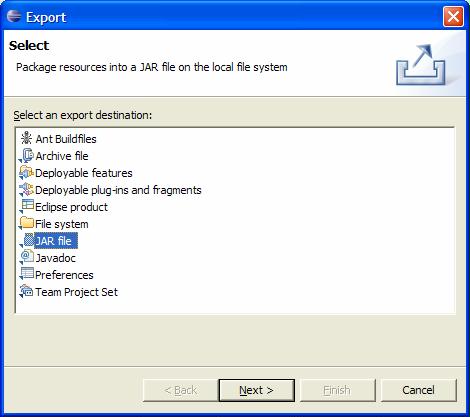
From the "File" menu select "Export..." to get the following
dialog box where we have selected "Archive file".
Click the "Next >" button to get the dialog box:

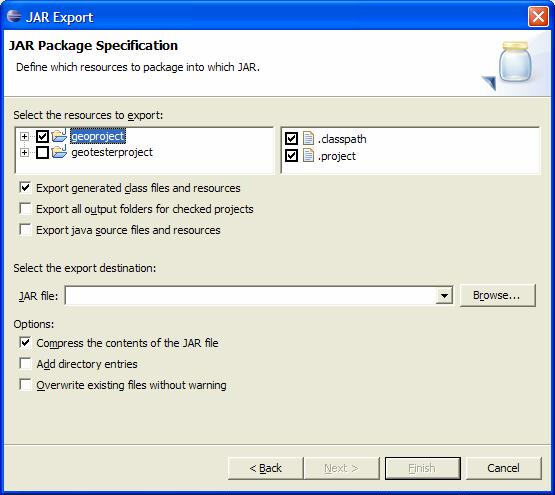
Verify that geoproject is selected and there
is a check mark in the box beside it.
Also verify that the boxes beside the .project
and .classpath are checked.
Also verify that the radio button "Save in zip format"
is selected.
You can chose any path and file name in the "To archive file:" box
or use the "Browse..." button.
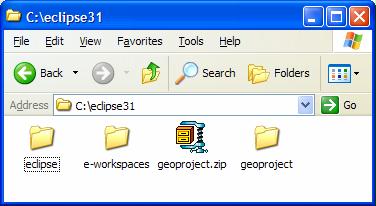
Here we have chosen c:eclipse31\geoproject.zip, the
directory in which Eclipse and our workspaces are contained.
It is conventional to give the zip file the same name as
the project although this is not necessary.
More than one project can be included in a zip file.
For example, we could have also checked
the geotesterproject box so that both projects
are selected.
Also, you don't have to export all the files in a project. You can open the tree on the left and check any set of files. However, we will only export complete projects.
Finally click the "Finish" button and the zip file will be created:
If you want to archive a project or give it to someone else
you can also export it as a file system.
As an example let us use project geoproject that
we created in the introductory
tutorial.
From the "Package Explorer" select geoproject.
From the "File" menu select "Export..." to get the following
dialog box where we have selected "File system".
Click the "Next >" button to get the dialog box:
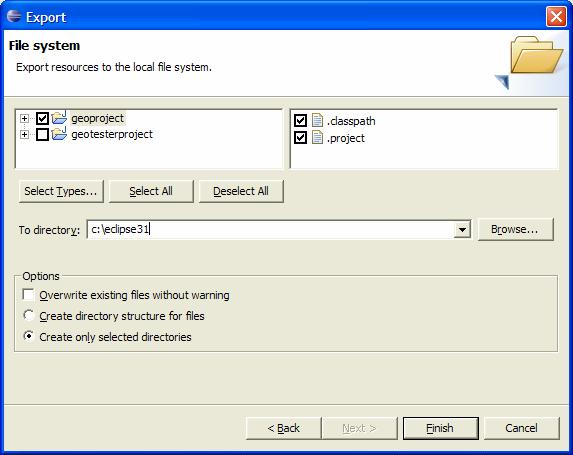
Verify that the check boxes are selected as shown.
In the "Directory: " box we have chosen c:\eclipse31
as the directory in which the project file system will be stored.
Finally click the "Finish" button and the file system will be created in the chosen directory:
This directory can be directly imported into an Eclipse workspace
as a project.
Also, it is exactly what would be obtained by unzipping the file
geoproject.zip.
After developing a Java application in an IDE such as Eclipse we probably want to run it outside the IDE or distribute it to other people. This can be done by creating a special kind of zip file called a JAR file (Java archive), that contains all the classes necessary to run the application.
JAR files can also be used to package up a collection of reusable
Java classes that can then be imported into many applications.
The Java Runtime Environment (JRE) is a collection of such JAR files,
the main one being rt.jar which contains the Java runtime
library classes.
We will use the example from the
introductory tutorial.
Recall that we have three classes: Point and
Circle in the geometry package in
project geoproject and CircleTester
in the geotester package in project
geotesterproject.
This means that we need a JAR file containing the class files
Circle.class, Point.class and
CircleTester.class so that we can run CircleTester
as an external application.
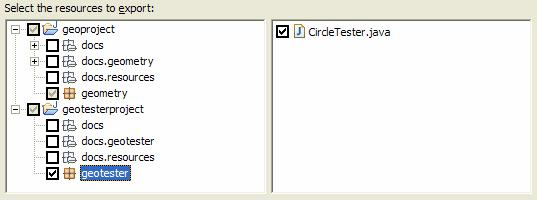
Select geoproject in the "Package Explorer".
From the "File" menu select "Export..." to get the following
dialog box in which we have selected "JAR file"
Click the "Next >" button to obtain the following dialog box:
Now make sure only Point and Circle
are selected from project geoproject:
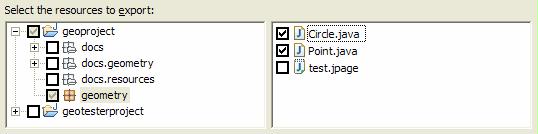
Similary we want to select only CircleTester from
project geotesterproject.
If we had wanted to save the Java source files in the JAR file as well as the class files we would check the box labelled "Export java source files and resources". In this example we will leave it unchecked.
Now enter the full path and name for the JAR file in the
"JAR file:" box (or use the "Browse.." button.
We have chosen c:\eclipse31\test.jar.

Now click "Next>" and then click "Next>" again to get the dialog box:
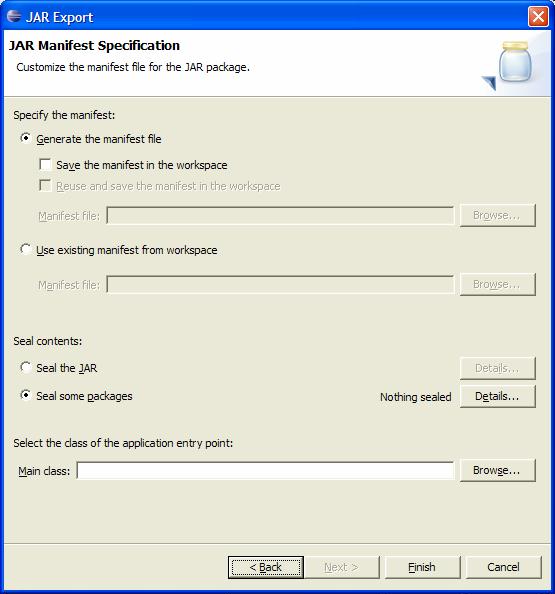
We now need to specify which class in the JAR file contains
the main method so make sure the radio button
labelled "Generate the manifest file" is selected.
To select the class click the "Browse..." button for the "Main class:" field:

This gives the "Select Main Class" dialog box
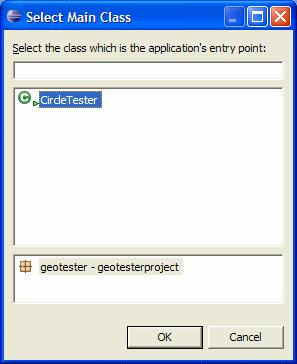
so select CircleTester and click "OK".
The "Main class:" field is now filled in with the fully qualified
name geotester.CircleTester of the main class:

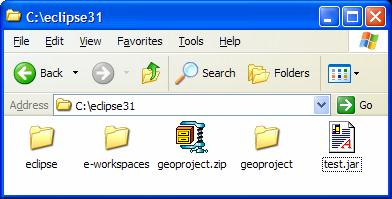
Finally, click the "Finish" button and the JAR file
test.jar will be created:
If you are using WinZip you can open this archive:

and you will see the three class files and a file
called Manifest.mf which contains information
specifying the main class.
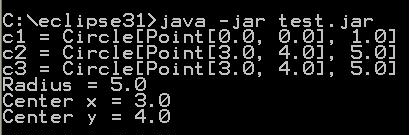
To run the application in the JAR file open a command prompt.
If you don't know how to do this from the "Start" menu
select "Run...", then type cmd in the "Open" field
and click the "OK" button.
Navigate to the eclipse31 directory using the command
cd c:\eclipse31Now type the command
dir test.jarto verify that
test.jar is there.
Now run the application using the command
java -jar test.jarto get