
NOTE: These tutorial were done using Eclipse version 3.1
NOTE: In these tutorials we install Eclipse, workspaces and other
files related to the tutorials in a directory called
c:\eclipse31. If you are using another directory such
as your home directory
c:\Documents and Settings\username\eclipse31
you will need to replace c:\eclipse31
everywhere with your directory.
Objective
Importing a Project Into a Workspace
Importing Files Into a Project
Importing Packages Into a Project
Next Tutorial: Using an External JAR File
In this tutorial we show how to import projects and packages into your Eclipse workspace.
Eclipse projects stored in a zip file can be directly imported into a workspace. Eclipse will automatically unzip them for us.
To show how this works we have created a small project
called hello and exported as a zip file called
hello.zip.
Right click on this link, choose "Save Target As..." and
save the zip file anywhere. We have saved it in
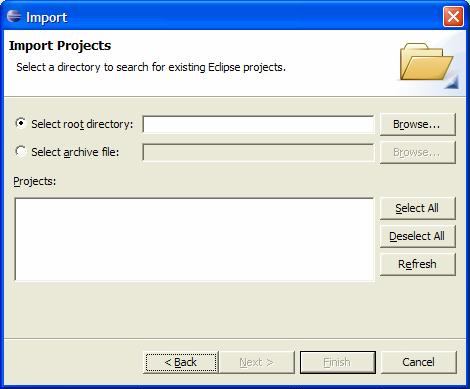
c:\eclipse31To import this project into Eclipse from the "File" menu select "Import..." and select "Existing Project into Workspace":
Click "Next >" to get the dialog box
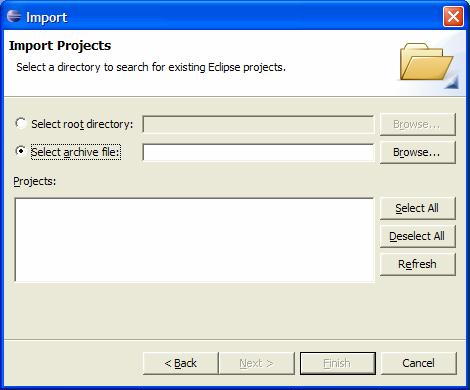
Now click the radio button for "Select archive file:" to get
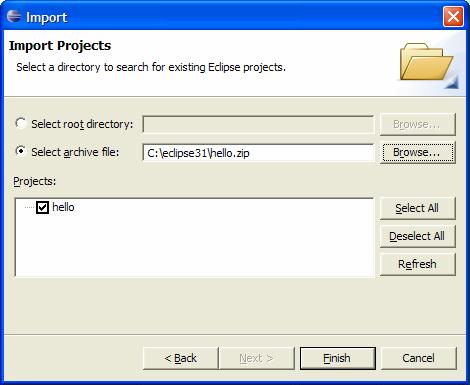
Now select "Browse..." and navigate to the hello.zip file that you saved. Click open to return to the "Import Projects"
dialog box:
Click "Finish" and the Package Explorer will show the project. It
has a package called test with a file called
HelloWorld.java which you can run as a Java
application).

It is also possible to import files into an existing project. This is very convenient if you have Java files that were created outside Eclipse.
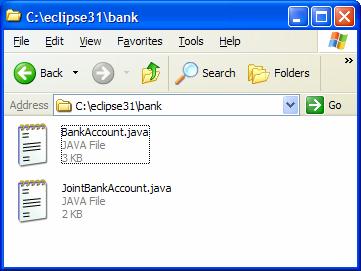
To illustrate this we have two files, one is
BankAccount.java and
the other is JointBankAccount.java.
Right click on them and save them somewhere such as
c:\eclipse31:

Now create a project called bankproject
(From "File" menu select "New", select "Project...",
select " Java Project", click "Next >" and enter the project name,
and click "Finish").

Select bankproject in "Package Explorer".
Now from the "File" menu select "Import...", select "File System",
click "Next >" and browse to the eclipse31 folder
in the "From directory:" field
(the parent folder of the one containing the two java files)
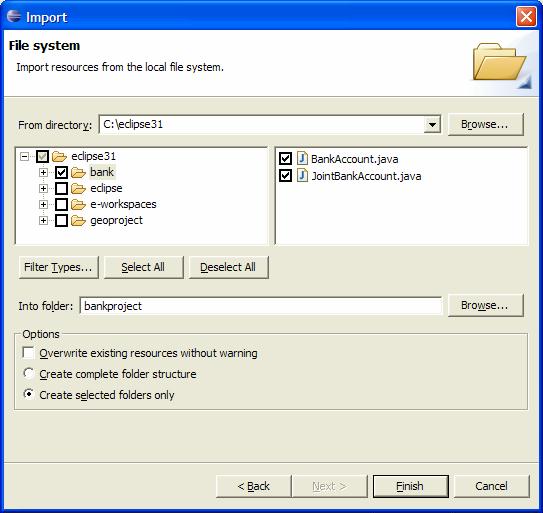
and you should see the dialog box

Here the "From directory:" box should contain
c:\eclipse31 or whichever directory you saved the
two Java source files in.
Also note that the eclipse31 directory
is in the left panel and we want to check the two classes
BankAccount.java
and JointBankAccount.java in the
right panel.
Also make sure the radio button for "Create selected folders only" is selected.
The "Into folder:" box should show bankproject,
the name of our project.
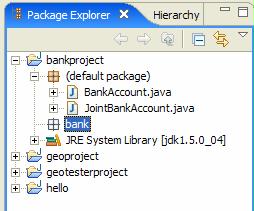
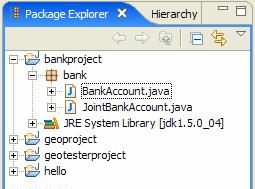
Finally, click the "Finish" button and the Package Explorer window should show

The two classes were imported into the default package because
they did not have a package statement
(load them into the editor to verify this).
Any class that does not have a package statement is considered
to be in the "default package".
Normally we put all our classes in named packages.
We can easily put our two classes in a package called
bank as follows:
First create a bank package in project
bankproject
(Select bankproject in "Package Explorer",
from "File" select "New Package", type the name
bank in the "Name" box and click "Finish").
The Package Explorer window now shows
Now just use the mouse to drag the two java files from the default
package to the selected bank package:
bank package. If you view these files with the
editor you will see that the package statement package bank;
has been automatically added to both files.
If you alredy have a package of files stored somewhere in your file system
that is not part of an Eclipse project,
the package can be imported into an existing Eclipse project.
To show how to do this first delete the bank package
created in the last section from project bankproject
(select the bank package, right click on it
and select "Delete").
We now provide two files, one is
BankAccount.java and
the other is JointBankAccount.java.
These versions already contain the package bank; statement.
So make a folder called bank in your file system (we will
make it in c:\eclipse31.
Right click on these two files and store
them in the bank folder to obtain
The bank directory is now a package directory and we
will import it directly into project bankproject as
follows:
Select bankproject in the "Package Explorer" and
from the "File Menu" select "Import...", select
"File System", click "Next >", and navigate using the top "Browse..."
button to obtain
bank.
It is important that the "From directory:" box shows
c:\eclipse31 not c:\eclipse31\bank.
Make sure the bank folder is selected in the left
pane and the two java files are selected in the right pane.
The "Into folder:" box should show only the project name bankproject
and the radio button should be selected for "Create selected folders
only".
Now click "Finish" and the Package Explorer window should show
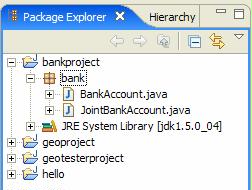
indicating that the bank package has been imported.