NOTE: These tutorial were done using Eclipse version 3.1
NOTE: In these tutorials we install Eclipse, workspaces and other
files related to the tutorials in a directory called
c:\eclipse31. If you are using another directory such
as your home directory
c:\Documents and Settings\username\eclipse31
you will need to replace c:\eclipse31
everywhere with your directory.
Objective
Creating a JAR File for a Package
Putting a JAR File on the Project Classpath
Accessing Java documentation in a JAR File
Next Tutorial: FAQ
In this tutorial we show how to create an external JAR file containing
the geometry package created in the
introductory tutorial.
Then we show how to reference this JAR file in a project by putting
it on the project classpath.
Thus, the Point and Circle classes
in the geometry package can be used in any project
just like rt.jar in the JRE System Library.
We also include the java documentation for the geometry
package in the JAR file and show how to configure Eclipse to
extract the documentation when you press "Shift F2" when the
cursor is on one of the class names in a java source file.
Creating a JAR file for a package is similar to creating a JAR file for an application (see Export Tutorial). except there is usually no class containing a main method.
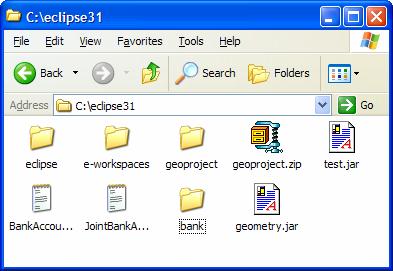
As an example let us create a JAR file called geometry.jar
containing the Point and Circle classes and
their java documentation.
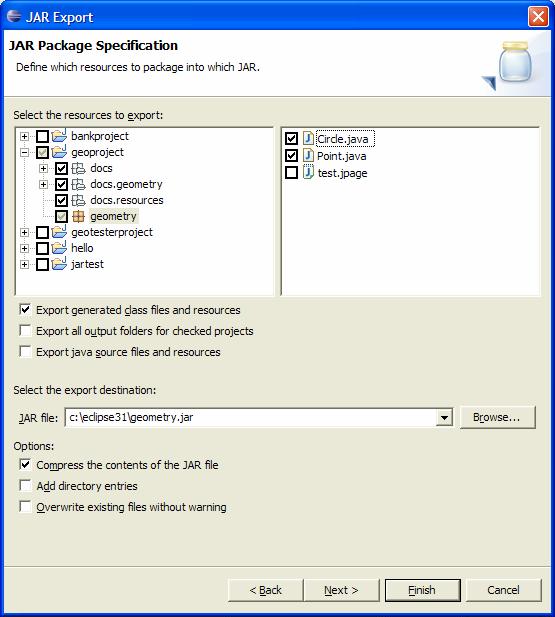
From the "File" manu select "Export...", select "JAR file", click
"Next >" and select only the files Point.java and
Circle.java and the documentation directories
as shown:
We have also specified the "Jar file:" field as
c:\eclipse31\geometry.jarWe won't store the Java source files in the JAR file so we have not checked the box "Export java source files and resources". Click "Finish" to obtain
To show how to put this JAR file on a project's classpath let us create
a test project called jartest
(From the "File" menu select "New", select
"Project...", select "Java Project", click "Next >", enter
the "Project name:" jartest, and click "Finish"):
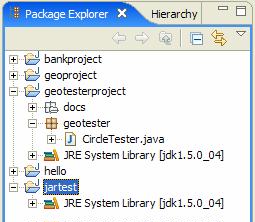
geotester package from project
geotesterproject to the jartest project
(selet the geotester package
in project geotesterproject, "Ctrl C" to copy it,
select the jartest project, "Ctrl V" to paste it,
to obtain:)
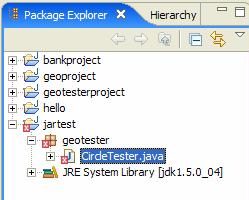
If you try to right click on CircleTester and try
to run it as a Java application using "Run as" thre will be
errors.
Double click on the CircleTester
class to display it in the editor and you will see the errors.
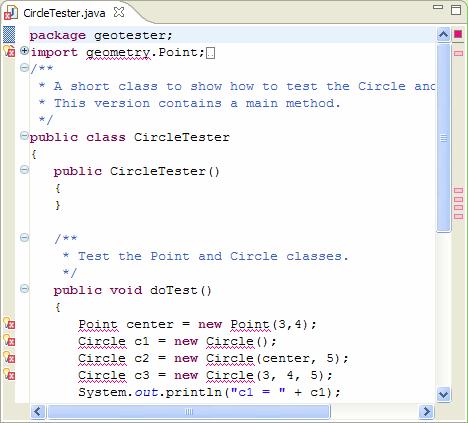
The geometry package and its two classes are not recognized.
This is understandable because this package in the jar file
geometry.jar is not on the jartest
project classpath.
To put it on the classpath we first associate a classpath
variable name (logical name) for this jar file as follows
From the Windows menu select "Preferences" and select "Classpath Variables" as shown:

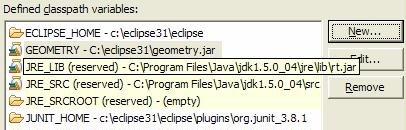
Notice there is already a list of varibles such as JRE_LIB
created by Eclipse. We want to add the name GEOMETRY to
this list:
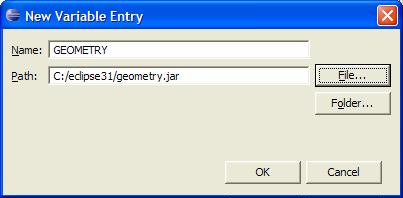
Click the "New" button, type the name GEOMETRY in the
"Name:" field, click the "File:" button and navigate to your jar file
(c:\eclipse31\geometry.jar):
Click "OK" to define the variable and its path. Now the list shows that our new variable exists:
Finally, click "OK".
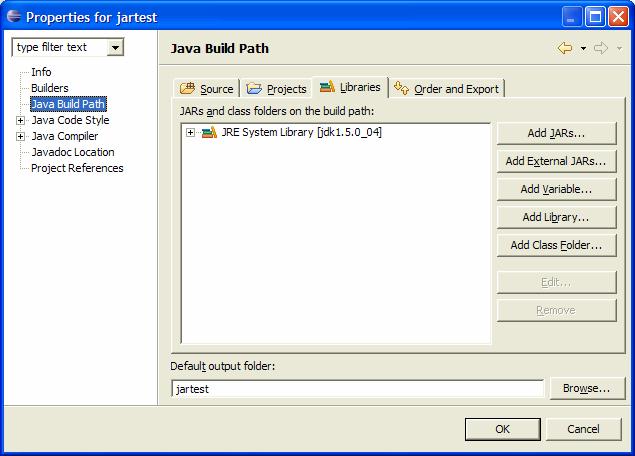
To associate this variable with the project select the
jartest project in the Package Explorer.
From the "Project" menu select "Properties", select
"Java Build Path" and select the "Libraries" tab to obtain:
Now click the "Add Variable..." button, choose the GEOMETRY
variable and click "OK" to obtain
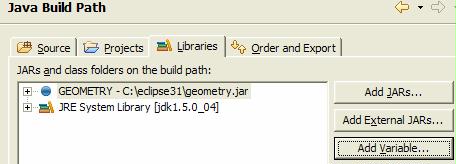
indicating that our variable has been added to the classpath (build path). Click "OK" and notice that all error messages hav now disappeared and we have:

You can now run CircleTester as a Java application.
Now we want to be able to access the Java documentation that we
stored in the JAR file. First move the cursor over the
Point class name in the editor window showing the
CircleTester class. Now use "Shift F2" and you will
get the dialog box

Click "OK".
To fix this select the jartest project in the
Package Explorer. From the "Project" menu select "Properties",
select "Java Build Path" and select the "Libraries" tab,
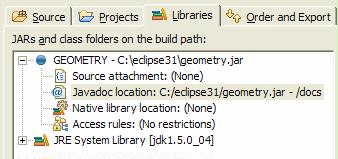
select the GEOMETRY entry and open the
tree to obtain
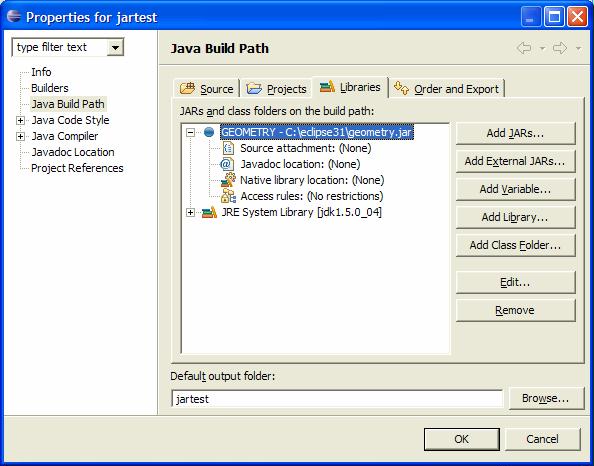
Select "Javadoc location: (none)" and click the "Edit..." button to obtain the dialog box.
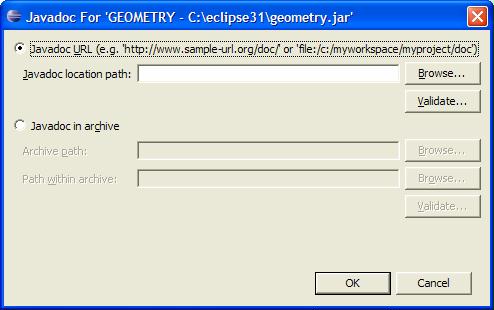
Since our javadoc is in an archive (JAR file) click on the radio button next to "Javadoc in archive". Now browse to the archive path using the top "Browse..." button then use the bottom browse button to navigate to the path within the archive to obtain
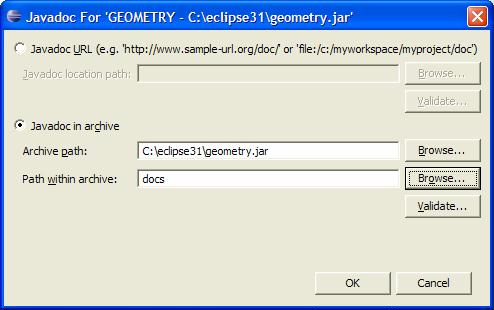
When the fields are set proprely click "OK" to get
Finally, click "OK" and now try to press "Shift F2" over one
of the class names Point or Circle
in the editor window. This will bring up the documentation for
the Point class. Also try it for the Circle
class.
You can also view the documentation for both classes in the package
by selecting the GEOMETRY entry in the Package
Explorer and then from the "Navigate" menu selecting
"Open External Javadoc":
